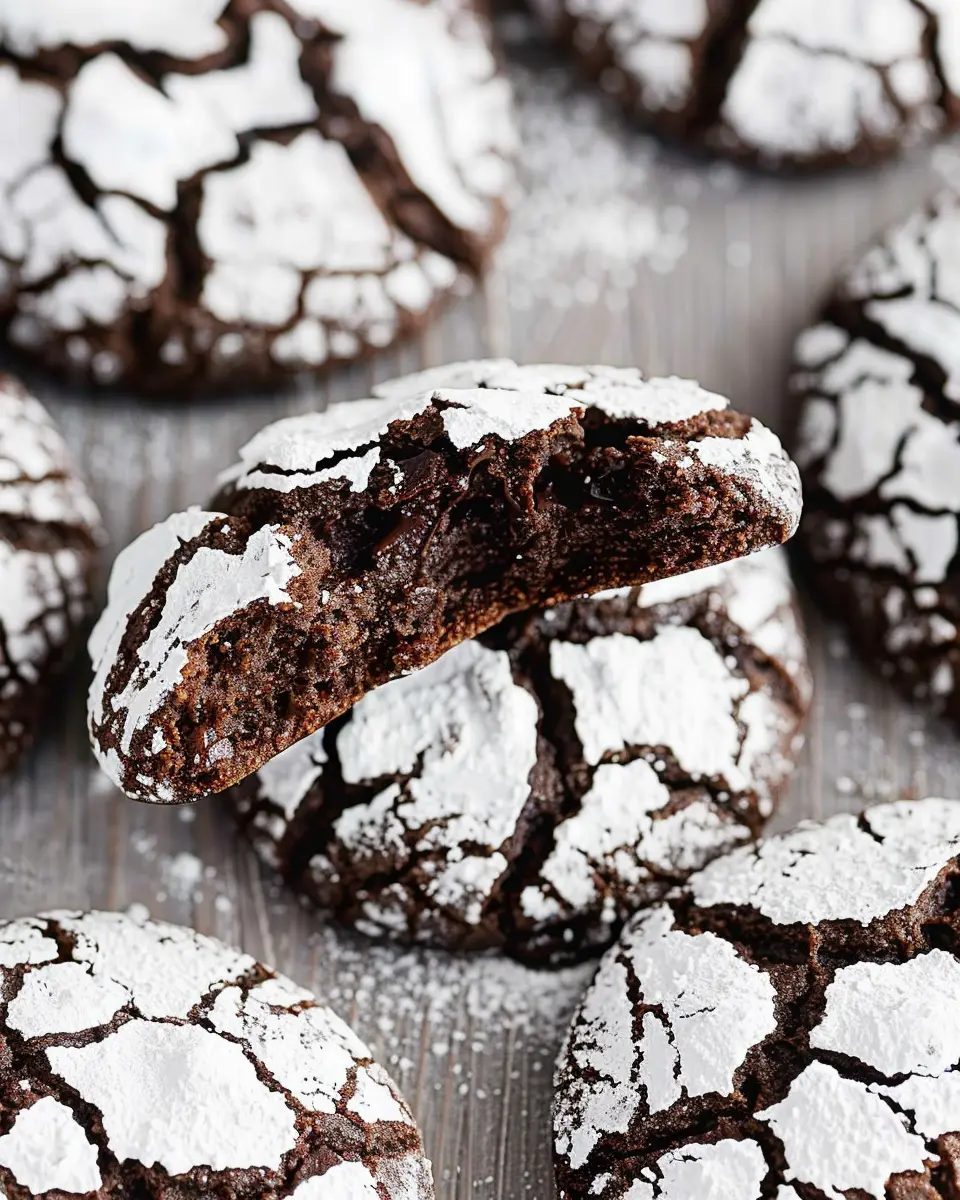
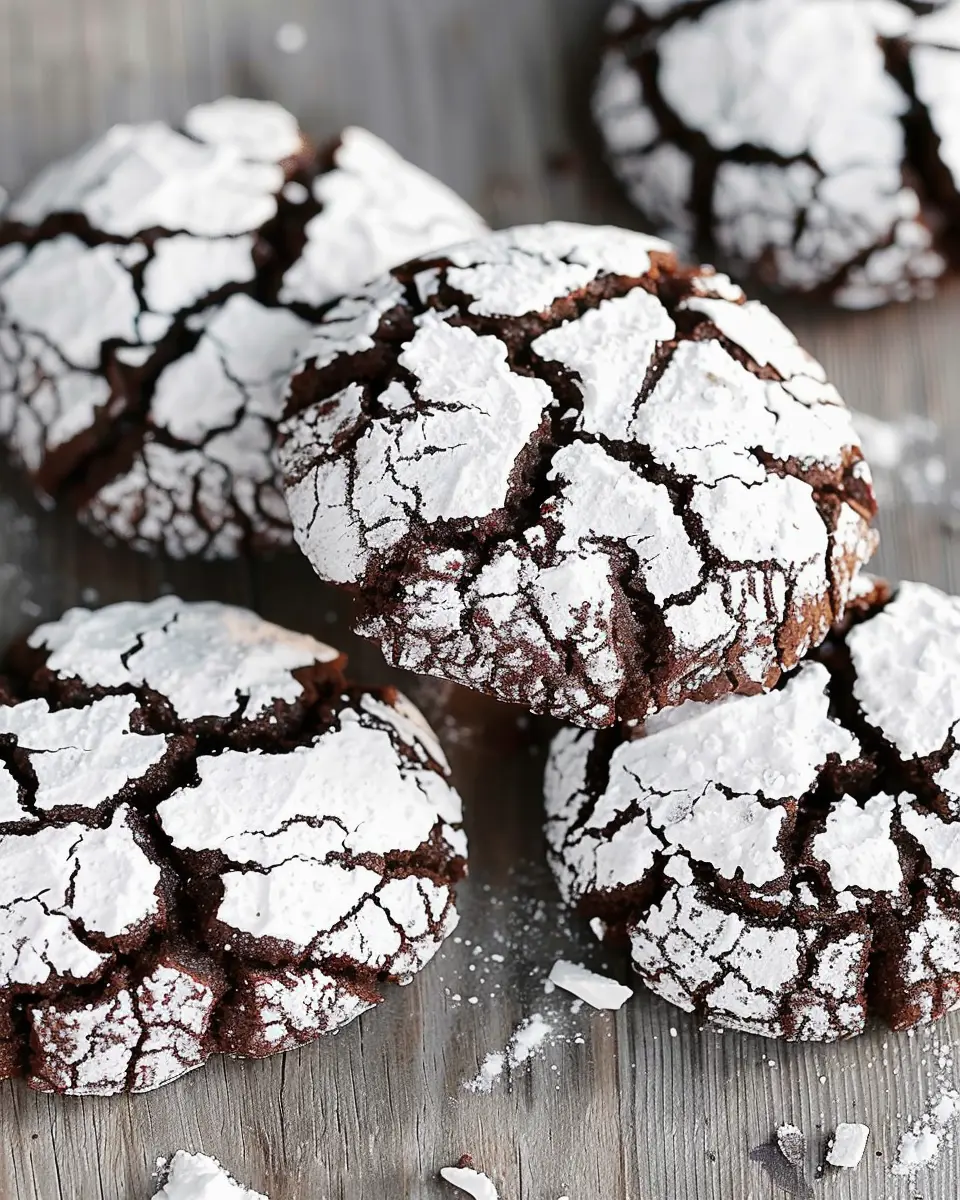
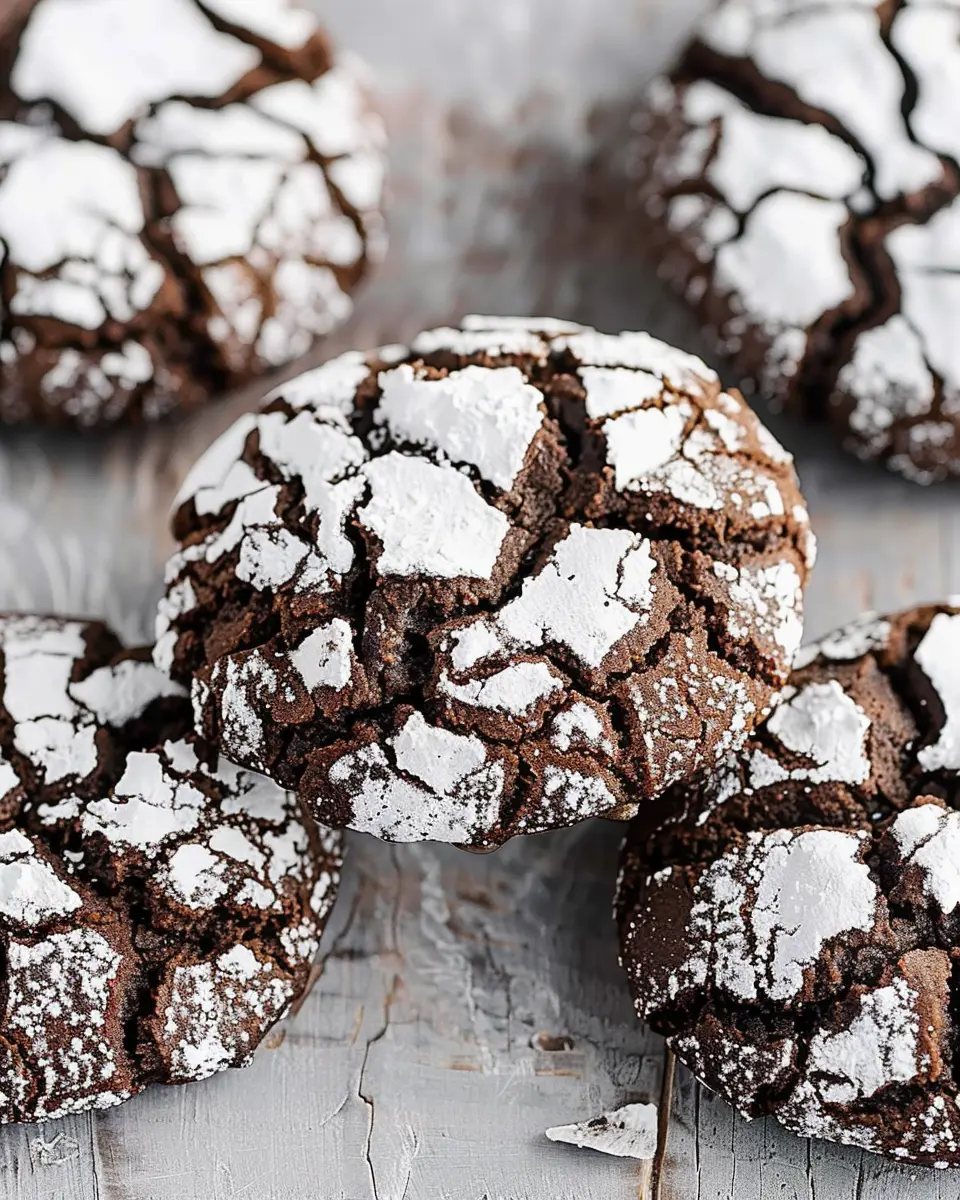
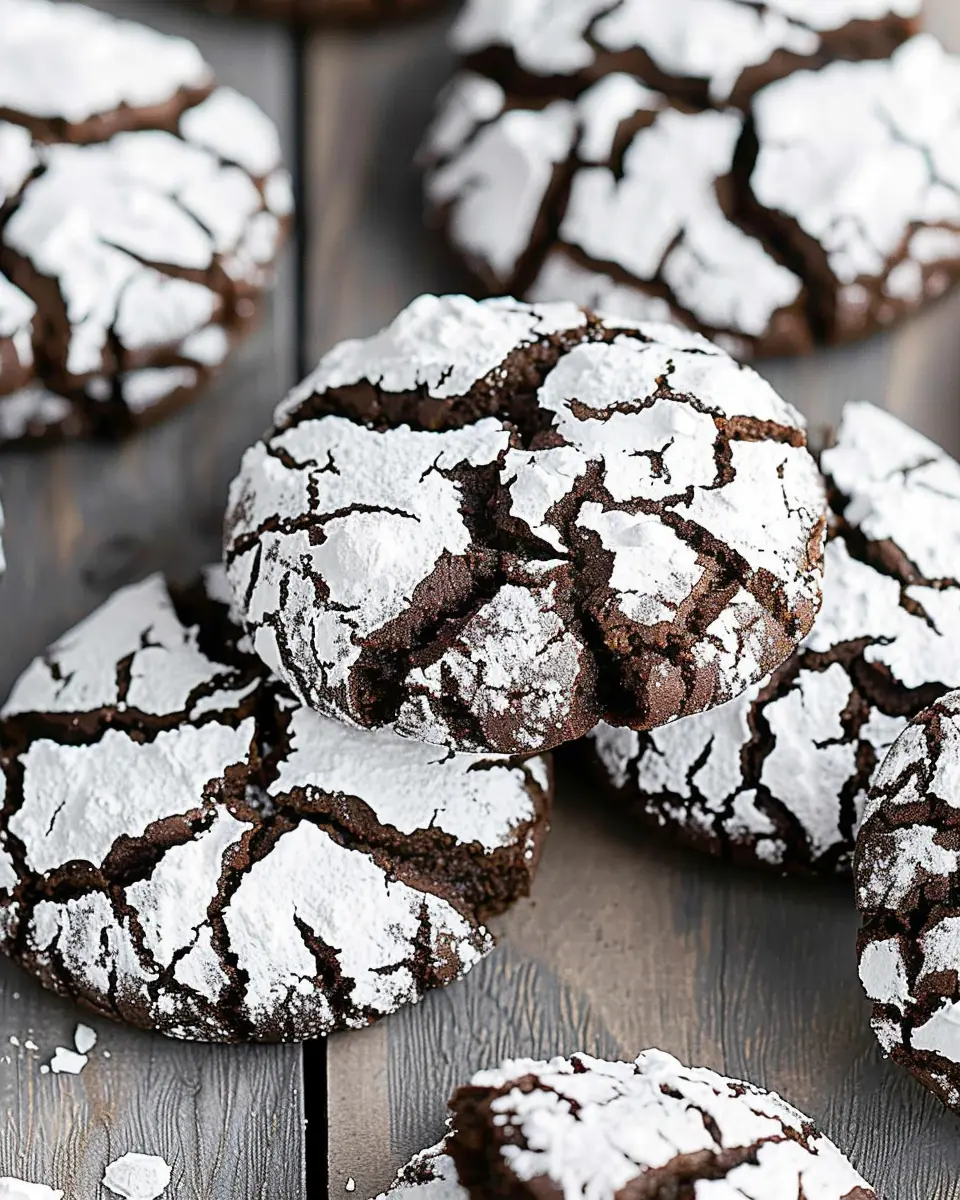
Introduction to Vintage Chocolate Crinkle Cookies
When was the last time you treated yourself to a delightful homemade cookie? If you’re a young professional juggling the demands of work and life, it’s essential to carve out moments of joy—even if they come in the form of a vintage chocolate crinkle cookie. These cookies, with their signature cracks and powdered sugar dusting, are not just a nostalgic treat; they’re also a delicious way to unwind after a long day or to impress friends during gatherings.
Why Chocolate Crinkle Cookies Are a Must-Try for Young Professionals
So why should you give vintage chocolate crinkle cookies a go? For one, they are incredibly straightforward to make. No need for fancy baking equipment or advanced techniques—just a few basic ingredients and a bowl. If you’re short on time, it typically only takes around 30 minutes from start to finish. Imagine whipping up a batch to share with your coworkers during a break or enjoying them while catching up on your favorite series.
But there’s more to them than just ease of preparation. According to a recent study by Food Insights, baking has been linked to improved mental well-being. The act of creating something with your hands can be therapeutic, helping to reduce stress levels after a hectic workweek. Plus, who doesn’t love the smell of freshly baked cookies wafting through the kitchen? It’s an instant mood booster!
Sharing a plate of vintage chocolate crinkle cookies can also be a great icebreaker. Invite your friends over for a casual evening, and serve these delightful treats. They’re versatile enough to complement a variety of beverages, whether it’s coffee, tea, or even your favorite sparkling water.
For those keen to discover even more cookie recipes, check out Food52 or The Kitchn for inspiration. You’ll find a treasure trove of cookie ideas that can turn any dessert table into a showstopper.
In summary, vintage chocolate crinkle cookies aren’t just about satisfying your sweet tooth—they’re about creating memories, fostering connections, and making time for those small yet significant joys in life. Want to experience the magic for yourself? Let’s dive into the recipe!
Ingredients for Vintage Chocolate Crinkle Cookies
Essential Ingredients for Perfect Cookies
When it comes to baking vintage chocolate crinkle cookies, the quality of the ingredients truly matters. You want each bite to be rich, fudgy, and packed with chocolate flavor. Here’s what you’ll need to create a delightful batch:
- All-purpose flour: This is the foundation of your cookie. It gives structure while allowing that melt-in-your-mouth texture.
- Granulated sugar: A cup of sweetness is essential; it balances the chocolate’s richness.
- Brown sugar: A little brown sugar adds moisture and a hint of caramel flavor that elevates these cookies!
- Unsweetened cocoa powder: The star ingredient! Opt for high-quality cocoa powder for a deep chocolate flavor.
- Baking powder: This helps the cookies rise, creating those iconic crinkles.
- Salt: A pinch enhances all the flavors and balances sweetness.
- Vegetable oil: Use oil instead of butter for that soft, fudgy interior—no creaming required!
- Eggs: Two large eggs bring moisture and bind everything together.
- Powdered sugar: For rolling! This creates a stunning snowy coating and a delightful texture.
Feel free to check out sources like King Arthur Baking for some tips on selecting the best ingredients. With these essentials in hand, you’re well on your way to crafting those nostalgic, delicious vintage chocolate crinkle cookies that everyone loves. Happy baking!
Step-by-Step Preparation of Vintage Chocolate Crinkle Cookies
When it comes to crafting the perfect batch of vintage chocolate crinkle cookies, the process is almost as delightful as the taste itself. These luscious cookies with their crinkled, powdered sugar tops bring you back to the warm kitchens of yesteryear. Here’s a friendly, step-by-step guide to help you through the magic of baking these beloved treats!
Gather Your Ingredients and Tools
Before jumping into the mixing bowl, take a moment to gather all your ingredients and tools. Having everything ready makes for a smooth and enjoyable baking experience. Here’s what you’ll need:
-
Ingredients:
-
1 cup granulated sugar
-
1/2 cup vegetable oil
-
2 large eggs
-
2 teaspoons vanilla extract
-
1 cup all-purpose flour
-
1/3 cup unsweetened cocoa powder
-
1 teaspoon baking powder
-
1/2 teaspoon salt
-
1 tablespoon espresso powder (optional for a flavor kick)
-
Powdered sugar for rolling
-
Tools:
-
Mixing bowls
-
Whisk or electric mixer
-
Baking sheets
-
Parchment paper (for easy cleanup)
-
Cooling rack
Feel free to check out sources like Food52 for more baking tips!
Mixing the Sugar and Oil
Start by combining the sugar and vegetable oil in a large mixing bowl. You can use a whisk or an electric mixer on medium speed. Mix them until they’re well incorporated and the mixture has a glossy appearance. This step is crucial as it creates the cookie’s tender texture.
Adding Eggs and Vanilla
Once your sugar and oil are combined, it’s time to introduce the eggs and vanilla extract. Add them one at a time to ensure even mixing. The key here is to beat the mixture until it’s fluffy; that’s how you’ll achieve that delightful crinkle later on.
Incorporating Cocoa and Espresso Powder
Next, sift in the cocoa powder and espresso powder (if you’re including it), stirring gently until completely blended. The rich chocolate aroma will surely have your taste buds tingling with anticipation.
Combining Dry Ingredients
In a separate bowl, whisk together the flour, baking powder, and salt. This step helps distribute the leavening agent evenly throughout the flour, ensuring your cookies rise beautifully. Gradually fold this dry mixture into your wet ingredients, mixing just until combined.
Chilling the Dough
Here comes a critical step: chill the dough for about 2 hours. This resting period helps firm up the dough, making it easier to shape and giving your cookies their signature crinkle. You can even prepare the dough the night before and bake them the next day.
Preparing to Bake
Once your dough is chilled, preheat your oven to 350°F (175°C) and line your baking sheets with parchment paper. Having them ready will allow for an even baking process and easy cleanup.
Rolling the Dough in Powdered Sugar
Scoop about a tablespoon of dough and roll it into a ball. Next, roll the dough ball in powdered sugar until it’s generously coated. This step is what gives your vintage chocolate crinkle cookies their distinct look and sweet finish.
Baking to Perfection
Place your powdered sugar-coated dough balls onto the prepared baking sheets, about 2 inches apart. Bake in your preheated oven for 10 to 12 minutes. Keep an eye on them; you want the edges to be set while the centers remain soft. If you’re unsure, err on the side of under-baking as they will continue to cook a bit after removal.
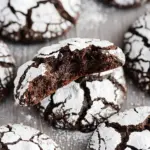
Cooling and Serving
Once baked, take them out and let your cookies cool for at least 5 minutes on the baking sheet before transferring them to a cooling rack. Allow them to cool completely, or if you can’t wait, enjoy a warm cookie with a glass of cold milk!
There you have it—a straightforward guide to making vintage chocolate crinkle cookies that not only taste divine but also evoke cherished memories. These cookies are perfect for sharing or simply indulging yourself. Happy baking!
Variations on Vintage Chocolate Crinkle Cookies
Adding Flavor with Mint or Orange Zest
One of the best parts of baking vintage chocolate crinkle cookies is how easily you can infuse them with different flavors. If you’re feeling adventurous, try adding a teaspoon of mint extract or a sprinkling of fresh orange zest to your batter. Mint offers a refreshing twist that pairs beautifully with chocolate, making your cookies taste downright indulgent. On the other hand, orange zest brings a zesty brightness that perfectly complements the rich chocolate, creating an unexpected but delightful flavor profile. Just imagine the aroma filling your kitchen—who could resist them?
Experimenting with Different Types of Cocoa
The cocoa you choose can dramatically change the flavor of your vintage chocolate crinkle cookies. For a deeper, richer taste, opt for Dutch-process cocoa. This variety has a smooth and mellow flavor, lending your cookies a luxurious touch. If you’re after something more robust, try using dark cocoa powder, which brings a more intense chocolate hit. Don’t hesitate to combine different cocoa types for a unique blend. You might even consider adding a touch of specialty cocoa, like raw cacao, for its distinct earthy notes.
Getting creative with your ingredients can elevate your vintage chocolate crinkle cookies to a whole new level. Whether you choose mint, orange zest, or a variation in cocoa, the possibilities are endless! Check out blogs like Serious Eats for expert baking tips and further inspiration. I’m always amazed at how a little tweak can transform a familiar recipe into something uniquely yours!
Cooking Tips and Notes for Vintage Chocolate Crinkle Cookies
The Importance of Chilling Dough
When making vintage chocolate crinkle cookies, one crucial step often overlooked is chilling the dough. Chilling for at least 30 minutes allows the flavors to meld beautifully and helps the cookies maintain their shape while baking. This simple step prevents them from spreading too much, resulting in that classic, puffy crinkle texture we all adore. Plus, it’s an excellent excuse to grab a cup of coffee or tea while waiting!
Tips for Achieving the Perfect Crinkle
To achieve those signature cracks, coat your dough balls generously in powdered sugar before baking. Here are a couple of tips to keep in mind:
- Rolling Technique: Roll the dough balls firmly yet gently; a little compression helps the sugar adhere better.
- Baking Time: Watch the clock! Bake them just until the edges are set but the centers remain soft—a good 10 to 12 minutes usually does the trick.
For additional techniques and insights, consider checking out this resource on baking cookies to elevate your cookie game! Happy baking!
Serving Suggestions for Vintage Chocolate Crinkle Cookies
Pairing with Coffee or Tea
One of the simplest yet most delightful ways to enjoy vintage chocolate crinkle cookies is by pairing them with your favorite coffee or tea. The rich, fudgy center of the cookie contrasts beautifully with the bold notes of a dark roast or the soothing flavors of a herbal tea. For coffee lovers, consider a creamy latte or cappuccino to amplify that chocolatey goodness. If tea is more your style, try a chai or a classic Earl Grey to add a touch of spice and warmth. Both options can elevate your cookie experience, making it a perfect mid-afternoon treat.
Presentation Ideas for Cookie Platters
When it comes to serving vintage chocolate crinkle cookies, presentation matters! Set the mood with an elegant cookie platter. Here are some tips to make your cookies the star of the show:
- Tiered stands: Use multi-level cake stands to showcase your cookies in style.
- Colorful liners: Place each cookie in colorful paper liners to add a festive touch.
- Garnish: Consider adding fresh mint leaves or a dusting of powdered sugar for a pop of color.
These simple touches can help create a warm, inviting atmosphere that encourages sharing and celebrating the joy of homemade treats. For more inspiration on hosting gatherings and cookie displays, you can check out resources from Martha Stewart.
By thoughtfully pairing and presenting vintage chocolate crinkle cookies, you not only enhance the experience but also turn an ordinary snack into a memorable occasion.
Time Breakdown for Vintage Chocolate Crinkle Cookies
Preparation Time
Getting started on your vintage chocolate crinkle cookies is a breeze! The preparation time is roughly 15 minutes. This part involves mixing ingredients, rolling the dough into balls, and coating them with powdered sugar—easy and fun!
Total Chilling Time
For the best results, let your dough chill for about 2 hours. Chilling is crucial as it helps the flavors develop and ensures that your cookies maintain that delightful crinkle as they bake.
Baking Time
Finally, your cookies will need about 10-12 minutes in the oven. Keep an eye on them to achieve that perfect balance of chewy and crisp. With this straightforward time breakdown, you’re well on your way to impressing friends and family with your homemade delights! For more great baking tips, check out resources like King Arthur Baking and Serious Eats.
Nutritional Facts for Vintage Chocolate Crinkle Cookies
Calories Per Cookie
Each vintage chocolate crinkle cookie packs around 100–120 calories, making them an indulgent treat that’s perfect for satisfying your sweet tooth without completely derailing your diet.
Key Nutritional Information
When it comes to the nutritional profile of these cookies, here’s what you need to know:
- Sugars: Approximately 8 grams per cookie, adding that delightful sweetness.
- Fat: About 4–5 grams, mostly from the chocolate and butter, providing richness.
- Carbohydrates: Roughly 15 grams, perfect for a quick energy boost.
- Protein: Contains around 1–2 grams, thanks to the addition of eggs.
These cookies are a fantastic blend of flavors and textures, and when enjoyed in moderation, they can fit nicely into a balanced diet. Want to dive deeper into cookie nutrition? Check out the USDA FoodData Central for more detailed insights!
FAQs about Vintage Chocolate Crinkle Cookies
When baking vintage chocolate crinkle cookies, questions can arise—after all, a little guidance keeps the fun in baking! Here are some common queries that might pop up when making these delightful cookies.
What Can I Use Instead of Espresso Powder?
If you find yourself without espresso powder, don’t fret! You can easily substitute it with instant coffee granules or cocoa powder. For a caffeine-free option, try using strong brewed coffee or a coffee extract. Just aim for a concentrated flavor that complements the rich chocolate in these cookies. Wondering why espresso is suggested? It enhances the chocolate’s richness, giving you that classic vintage taste!
How Should I Store Leftover Cookies?
To keep your vintage chocolate crinkle cookies soft and chewy, store them in an airtight container at room temperature. Adding a slice of white bread can help maintain their moisture. If you want to enjoy them later, you can minimize exposure to air to prevent them from drying out.
Can I Freeze Chocolate Crinkle Cookie Dough?
Absolutely! Freezing the dough is a fantastic way to enjoy these cookies anytime. Just scoop out your dough balls, freeze them on a baking sheet until firm, and then transfer them to a zip-top bag. To bake, simply pull out the desired amount and bake them straight from the freezer—no thawing needed! This method not only preserves the flavor but also makes cookie cravings much easier to satisfy. For more tips on freezing dough, check here for helpful resources.
With these handy FAQs, you’re ready to whip up a batch of scrumptious vintage chocolate crinkle cookies without a hitch! Enjoy the process and happy baking!
Conclusion on Vintage Chocolate Crinkle Cookies
The Joy of Homemade Cookies
There’s something truly magical about baking vintage chocolate crinkle cookies. The warmth of the oven, the enticing aroma wafting through your kitchen, and the satisfaction of creating something delicious from scratch can brighten any day. Not only do these cookies satisfy your sweet cravings, but they also evoke a sense of nostalgia, recalling cherished moments with loved ones.
As you enjoy these delightful treats, think about sharing them with friends or family, creating new memories around the table. Remember, the process of baking is just as important as the result, making every step worthwhile. So, roll up your sleeves and embrace the joy of homemade cookies—your taste buds will thank you! For more inspired baking ideas, check out this guide on cookie decorating. Happy baking!
PrintVintage Chocolate Crinkle Cookies: The Best Homemade Treats
These vintage chocolate crinkle cookies are a delightful and nostalgic treat perfect for any occasion.
- Prep Time: 15 minutes
- Cook Time: 12 minutes
- Total Time: 42 minutes
- Yield: 24 cookies 1x
- Category: Dessert
- Method: Baking
- Cuisine: American
- Diet: Vegetarian
Ingredients
- 1 cup granulated sugar
- 1/2 cup brown sugar
- 1/2 cup unsweetened cocoa powder
- 1/2 cup vegetable oil
- 2 large eggs
- 1 teaspoon vanilla extract
- 1 teaspoon baking powder
- 1/2 teaspoon salt
- 1 cup all-purpose flour
- 1 cup powdered sugar
Instructions
- Preheat the oven to 350°F (175°C).
- In a bowl, mix granulated sugar, brown sugar, and cocoa powder.
- Add vegetable oil, eggs, and vanilla extract; mix until smooth.
- In another bowl, combine baking powder, salt, and flour; gradually add to the chocolate mixture.
- Chill the dough in the refrigerator for at least 30 minutes.
- Form dough into balls and roll each ball in powdered sugar.
- Place on a baking sheet lined with parchment paper.
- Bake for 10-12 minutes until edges are set.
- Let cool on the baking sheet for a few minutes before transferring to a wire rack.
Notes
- For a fudgier cookie, reduce the flour slightly.
- Experiment with adding nuts or chocolate chips for extra texture.
Nutrition
- Serving Size: 1 cookie
- Calories: 100
- Sugar: 12g
- Sodium: 50mg
- Fat: 5g
- Saturated Fat: 1g
- Unsaturated Fat: 4g
- Trans Fat: 0g
- Carbohydrates: 14g
- Fiber: 1g
- Protein: 1g
- Cholesterol: 35mg
Keywords: Vintage Chocolate Crinkle Cookies, homemade cookies, chocolate cookies