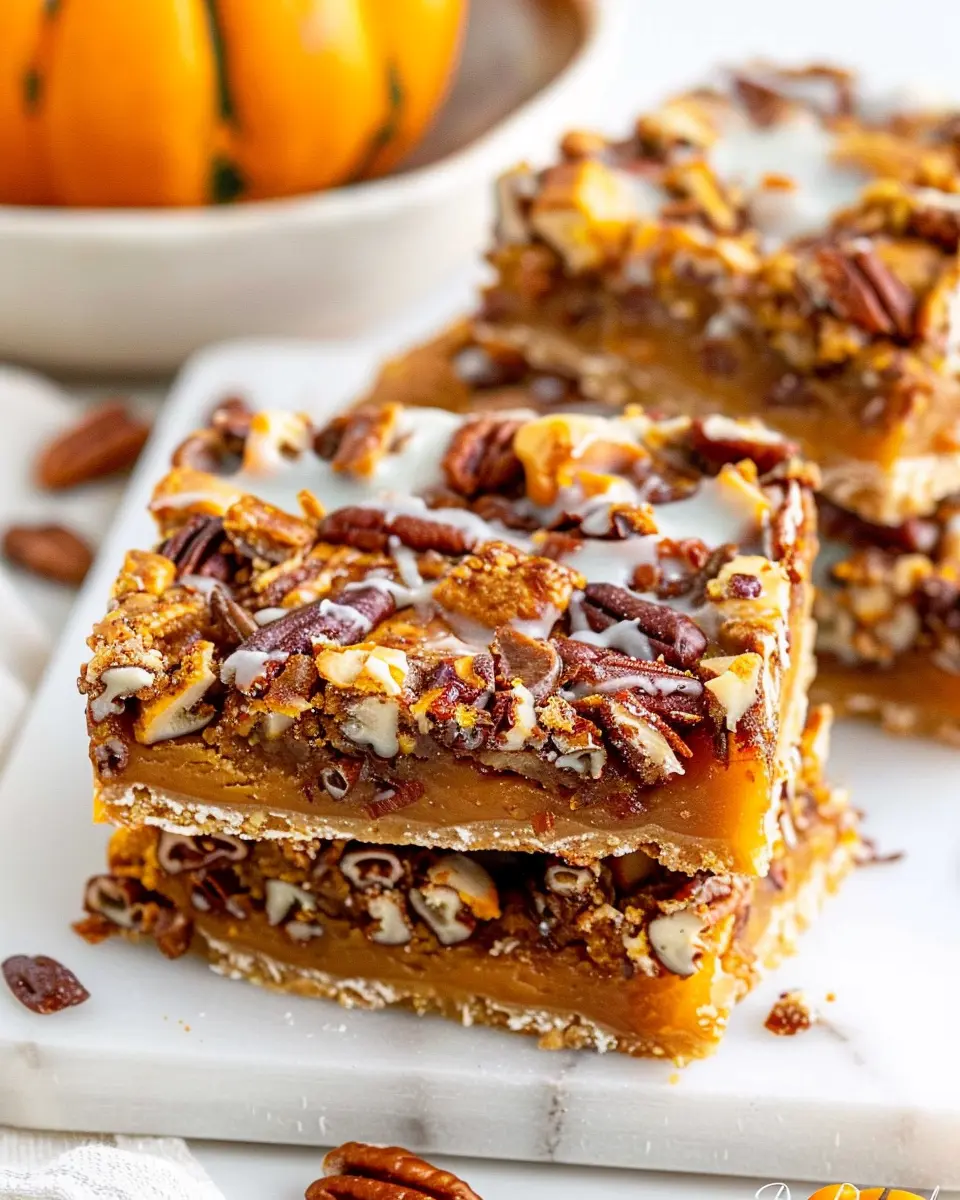
Introduction to Pumpkin Magic Bars
The sweet allure of homemade pumpkin bars
Autumn is here, and there’s something truly enchanting about the arrival of pumpkin season. Nothing captures that vibe quite like homemade pumpkin bars. The warm spices, creamy pumpkin filling, and nutty crust combine to create a dessert that feels like a cozy hug. These treats not only satisfy your sweet tooth but also spread a little joy to those around you. Whether you’re baking for yourself or a gathering, you can’t help but appreciate how these bars can lift spirits and spark smiles.
Have you ever struggled to find the perfect recipe for a potluck or just a cozy evening at home? This is where Pumpkin Magic Bars come into play. Not only are they delicious, but they also offer a delightful twist on traditional pumpkin desserts. Their unique layering of flavors and textures is what truly sets them apart. If you have a busy lifestyle, you might especially love the ease with which these bars come together—no intricate techniques or complicated steps required!
Why Pumpkin Magic Bars are ideal for young professionals
As a young professional, balancing work and life can be challenging. Don’t you just wish you could enjoy a delicious homemade treat without spending hours in the kitchen? That’s where this Pumpkin Magic Bars Recipe shines.
- Quick and Simple: With minimal prep time and straightforward steps, you can whip these bars up in no time. A perfect solution for last-minute baking!
- Efficient Cleanup: Fewer dishes mean lighter work, making it easier to stick to your busy schedule.
- Shareable Goodness: They’re great for sharing with coworkers or friends at game night, creating a sense of community. Plus, who doesn’t love to bask in the compliments after bringing these homemade bars to the table?
Studies show that engaging in cooking can be therapeutic, helping to ease stress and improve mental well-being. Why not combine that with a dessert that will impress your friends? And if you want to take the experience up a notch, consider pairing these magical bars with a rich cup of warm cider or a cozy non-alcoholic beverage.
Get ready to embark on your baking adventure with our easy-to-follow Pumpkin Magic Bars Recipe and bring some festive joy to your life!
Ingredients for Pumpkin Magic Bars
Creating the perfect Pumpkin Magic Bars is all about the right combination of ingredients. Let’s break it down for you to ensure your bars are as magical as possible!
Basic ingredients for the crust
The foundation of our bars is a buttery, graham cracker crust that brings the right crunch. Here’s what you’ll need:
- Graham cracker crumbs: About 1 ½ cups will give you that essential texture.
- Unsalted butter: You’ll need ½ cup, melted to bind everything together.
- Granulated sugar: Just ¼ cup adds a hint of sweetness.
This crust serves as a delicious backdrop for all that pumpkin goodness.
Essential ingredients for the pumpkin layers
For the star of our show, the pumpkin layer, gather these key items:
- Canned pumpkin puree: One generous cup is what brings that rich pumpkin flavor.
- Sweetened condensed milk: Combining 1 can provides creaminess and sweetness.
- Pumpkin pie spice: 2 teaspoons elevate the seasonal vibe.
These components create a moist, delectable center that will have everyone coming back for seconds.
Optional ingredients for flavor enhancement
Want to take your Pumpkin Magic Bars Recipe to the next level? Consider adding:
- Chocolate chips: Semi-sweet or dark, about 1 cup makes it extra indulgent.
- Chopped nuts: Pecans or walnuts, about ½ cup, can add a wonderful crunch.
Feel free to customize these bars to match your taste—after all, magic is about personal touches!
By blending these ingredients thoughtfully, you’re one step closer to creating a dessert that’s sure to impress. For guidance on other delicious recipes, check out sources like The Spruce Eats or Food Network. Enjoy baking!
Step-by-step Preparation for Pumpkin Magic Bars
Making Pumpkin Magic Bars is not just about baking; it’s about creating a warm, comforting experience that captures the essence of fall in every bite. From the rich layers of creamy pumpkin to the crunchy toppings, this recipe is guaranteed to impress your friends and family. Let’s dive into the preparation process step by step.
Gather your ingredients
Before you start whisking and mixing, take a moment to gather all your ingredients. This makes the cooking process smoother, and you’ll avoid those last-minute trips to the grocery store. For our Pumpkin Magic Bars Recipe, you’ll need:
- 1 ½ cups graham cracker crumbs
- ½ cup unsalted butter, melted
- 1 cup sweetened shredded coconut
- 1 cup semi-sweet chocolate chips
- 1 cup pumpkin puree (not pumpkin pie filling)
- 1 cup sweetened condensed milk
- ½ cup brown sugar
- 2 large eggs
- 1 teaspoon vanilla extract
- 1 teaspoon pumpkin pie spice
- ½ teaspoon salt
You can find many of these ingredients at your local grocery store. For organic options or specialized items, consider websites like Thrive Market or Whole Foods.
Create the crust
To start off, let’s make that buttery graham cracker crust. In a mixing bowl, combine the graham cracker crumbs and melted butter. Stir them together until the crumbs are evenly coated; it should resemble wet sand. Press this mixture firmly into the bottom of a lined 9×13-inch baking dish. You can use the back of a measuring cup to pack it tightly. This step is crucial because a lovely, sturdy crust ensures your Pumpkin Magic Bars maintain their shape when cut.
Prepare the pumpkin layer
Now, let’s get to the magical filling! In a separate bowl, whisk together the pumpkin puree, sweetened condensed milk, brown sugar, eggs, vanilla extract, pumpkin pie spice, and salt. This combination brings together the rich flavors of pumpkin and the sweetness of the condensed milk. Mix until smooth and well blended. If you’re a fan of chunky pumpkin desserts, feel free to leave it a bit on the thicker side. Your bars will end up perfectly moist and bursting with flavor.
Layer it up with toppings
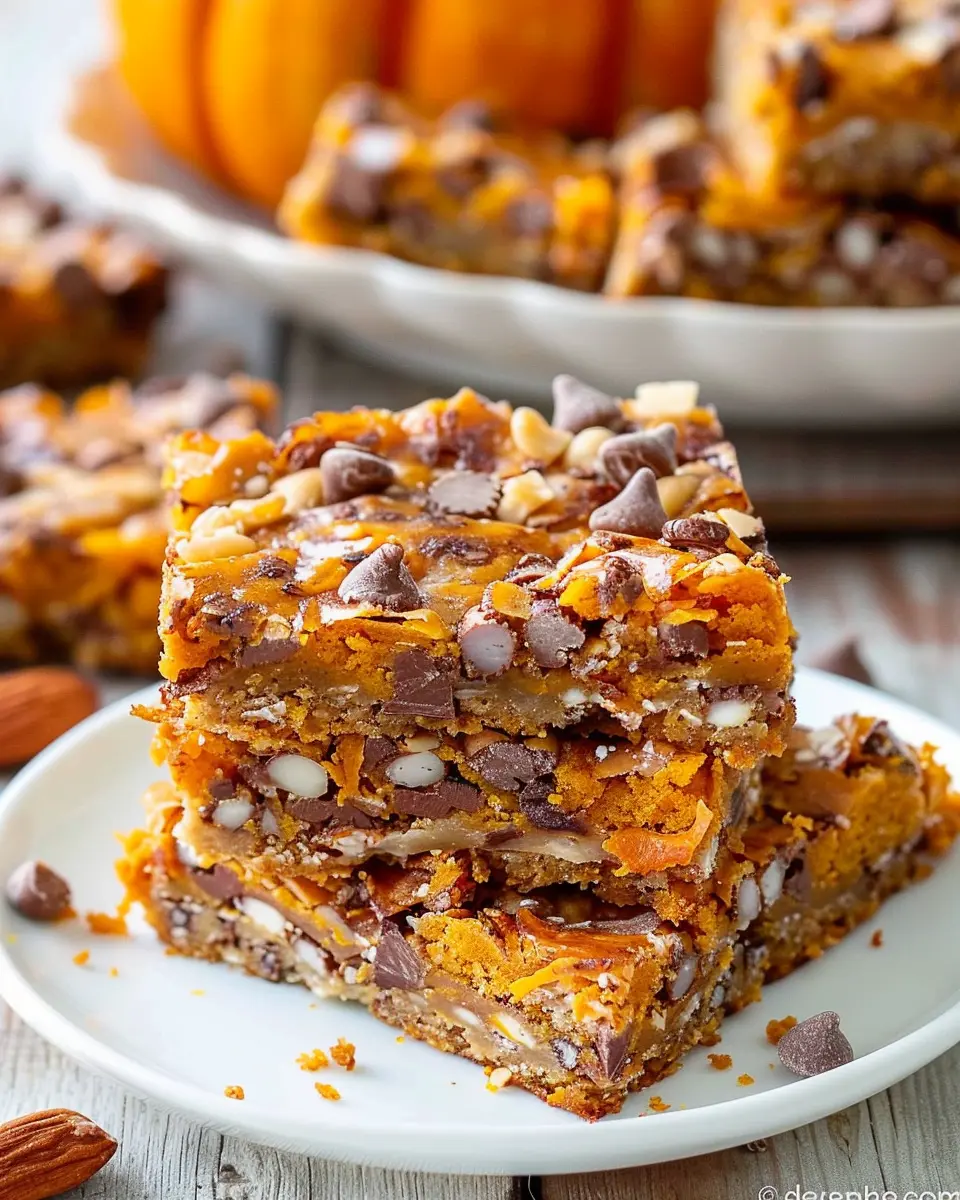
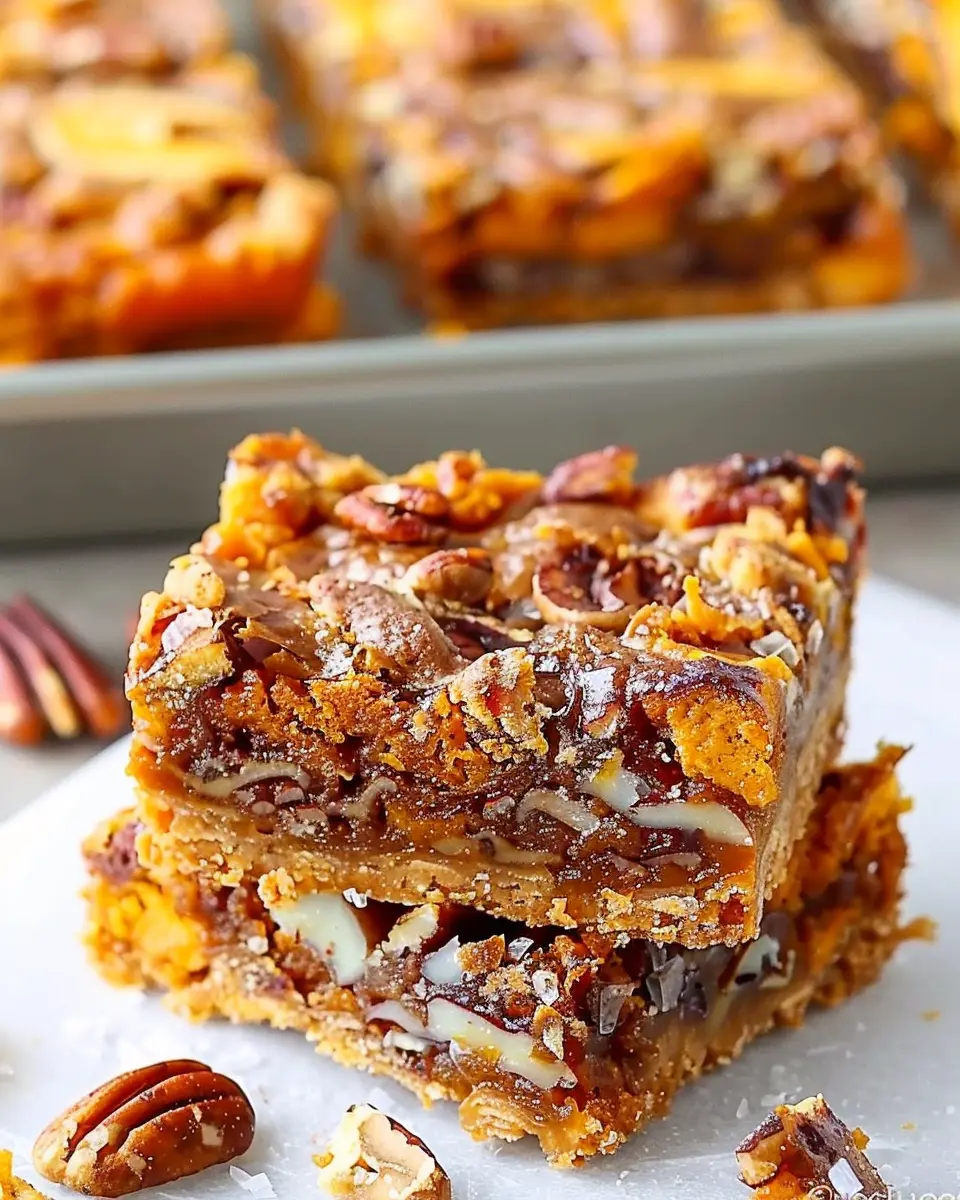
Once your pumpkin filling is ready, pour it over the crust, spreading it evenly with a spatula. Now comes the fun part: sprinkle the shredded coconut and semi-sweet chocolate chips on top. This isn’t just about flavor—it’s about texture too. The coconut adds a chewiness, while the chocolate provides a delightful surprise in every bite. You can also consider adding nuts or dried fruit if you’re feeling adventurous. Mix and match to create your perfect version!
Bake and cool the bars
Time to put your Pumpkin Magic Bars in the oven! Preheat it to 350°F (175°C), and bake for about 25-30 minutes. The bars should look golden brown around the edges and slightly set in the middle. Once baked, remove them from the oven and let them cool in the pan for about 30 minutes. After that, transfer them to the refrigerator for at least 2 hours, which will make cutting into them much easier. The chilling step is essential because it allows the flavors to meld and the bars to firm up for optimal slicing.
And there you have it! With just a few thoughtful steps, you’ll be ready to enjoy your homemade Pumpkin Magic Bars. Whether you’re bringing them to a gathering or savoring them during a cozy night in, these bars are sure to be a hit. Happy baking!
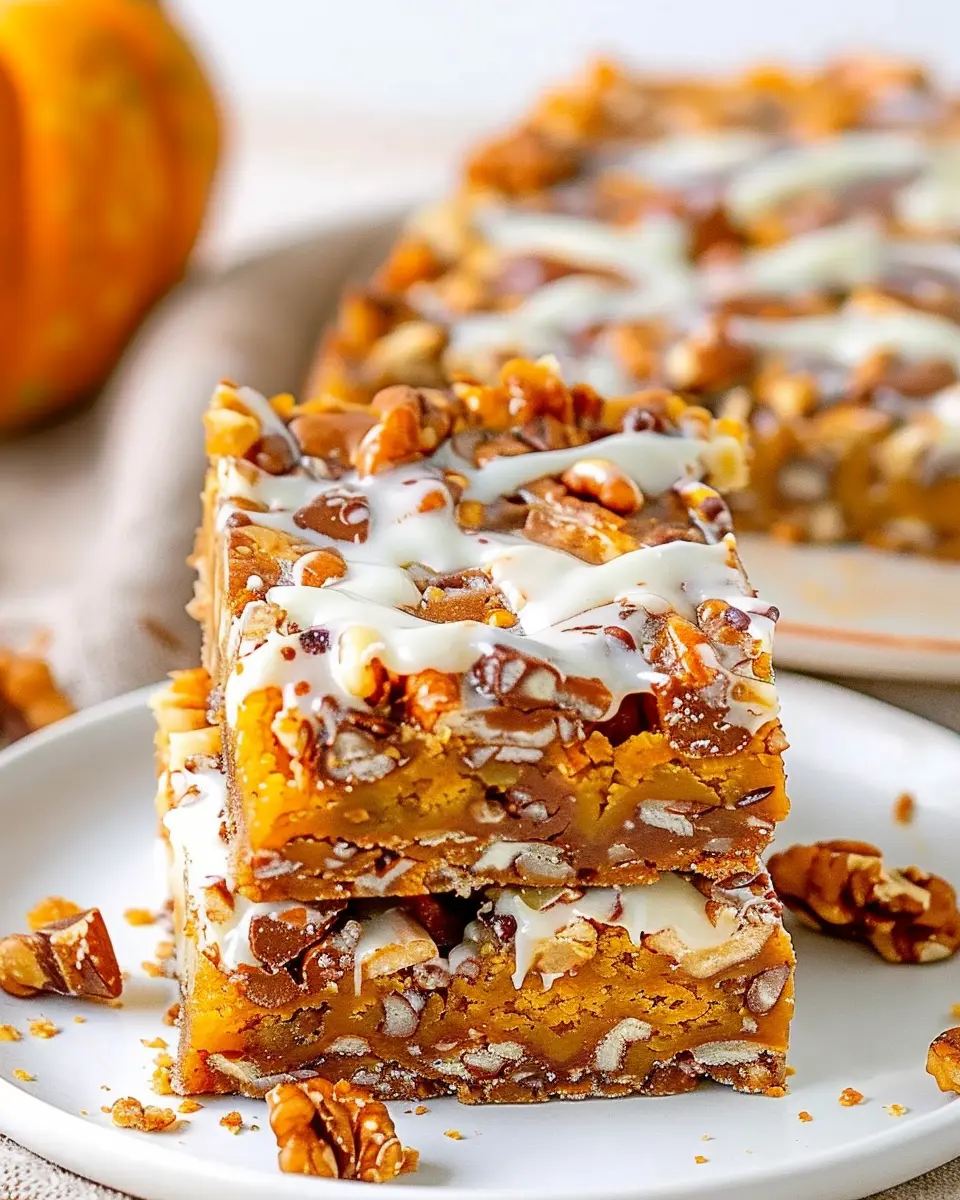
Variations on Pumpkin Magic Bars
When it comes to Pumpkin Magic Bars, let your creativity shine! These delightful treats are not only easy to make, but they’re also incredibly versatile. Here are a few exciting variations to elevate your dessert game.
Add Chocolate Chips for Extra Indulgence
If you’re a chocolate lover, consider adding a generous sprinkle of chocolate chips to your bars. This simple addition enhances that sweet-and-savory combination that works so well with pumpkin. Dark chocolate chips add depth and richness, while white chocolate offers a fun contrast. You might even try mixing flavors for a unique twist!
Make It Gluten-Free with Alternative Flours
For those watching their gluten intake, there’s good news! You can still enjoy this Pumpkin Magic Bars Recipe by swapping out all-purpose flour for gluten-free alternatives like almond flour or oat flour. These options maintain the bars’ delicious texture while catering to gluten-sensitive eaters. Just be sure to check the specific flour’s moisture levels—the right balance is key!
Experiment with Different Nuts and Spices
Nuts and spices can transform your bars into a gourmet experience. Try adding chopped pecans, walnuts, or even pistachios for a nutty crunch. As for spices, consider infusing your bars with a hint of cardamom or ginger for an unexpected kick. Don’t hesitate to play around until you discover your perfect flavor balance!
With these variations, your Pumpkin Magic Bars will never get boring. So go ahead, mix things up and enjoy the magic of fall flavors in every bite! For more inspiration, check out this guide on baking with pumpkin. Happy baking!
Cooking Tips and Notes for Pumpkin Magic Bars
Keep your bars fresh with proper storage
To maintain the freshness of your Pumpkin Magic Bars, start by storing them in an airtight container. Separating layers with parchment paper will prevent sticking, and they can last in the fridge for about a week—perfect for those late-night cravings or unexpected guests! If you want to preserve them for longer, try freezing individual pieces wrapped in plastic wrap. Thaw in the fridge overnight, and enjoy your slice of fall goodness whenever you wish.
Essential baking tools for success
Having the right tools can make all the difference when following your Pumpkin Magic Bars Recipe. Here’s what you’ll need:
- Mixing bowls: A good set allows for better mixing and minimizing mess.
- Whisk and spatula: For combining ingredients evenly and scraping every bit from the bowl.
- Baking pan: A 9×13 inch dish is ideal for even baking and achieving that perfect layer.
You can check out Serious Eats for a deeper dive into essential baking equipment. Happy baking!
Serving Suggestions for Pumpkin Magic Bars
Pair with a hot drink for a cozy treat
Nothing complements Pumpkin Magic Bars quite like a steaming cup of your favorite hot beverage. Imagine curling up on the couch with a rich pumpkin spice latte or a comforting herbal tea. The warm flavors of cinnamon, nutmeg, and clove in your drink will blend beautifully with the sweet, chewy decadence of your bars.
If you’re looking for something unique, consider pairing them with a spiced chai or even a hot apple cider. Both options will elevate your snack time into a cozy experience, perfect for chilly evenings.
Make it a party pleaser with a dessert platter
Planning a gathering? Consider incorporating your Pumpkin Magic Bars Recipe into a tempting dessert platter. Combine these bars with an assortment of fall-inspired treats like mini pecan pies, caramel apple slices, or even pumpkin cheesecake bites.
Visually, this will create a vibrant display that will entice your guests. You might even consider serving alongside a selection of gourmet coffee or a comforting herbal tea. This way, everyone will find something to love, making your gathering a hit!
For more ideas on how to elevate your dessert presentations, check out this handy resource from Food Network.
Time Breakdown for Pumpkin Magic Bars
When you’re ready to indulge in these delightful Pumpkin Magic Bars, it’s essential to understand how your time will be spent to ensure a smooth baking experience.
Preparation Time
First up, you’ll need about 15-20 minutes for prep! This includes gathering your ingredients like pumpkin puree and graham cracker crumbs, and mixing everything together to create that scrumptious base. Don’t rush—enjoy this part and even consider putting on your favorite playlist to set the mood!
Baking Time
Now, for that heavenly aroma to fill your kitchen, the baking time is approximately 25-30 minutes. While they’re baking, feel free to take a moment to sip on a warm chai tea or just relax.
Cooling Time
Lastly, the patience game begins. Allow your Pumpkin Magic Bars to cool for about 30-45 minutes before cutting into them. This step is crucial for achieving those perfect, gooey layers! So while you wait, why not explore more on how to creatively enjoy pumpkin in your diet? Consider checking out Pumpkin Health Benefits for some insightful tips!
With this time breakdown, you’re more than ready to dive into making these irresistible bars!
Nutritional Facts for Pumpkin Magic Bars
Calories per serving
Each serving of these delightful Pumpkin Magic Bars packs in about 190 calories. This makes them a fantastic option for a sweet treat that won’t completely derail your day. Perfect for mid-afternoon cravings or a cozy evening indulgence.
Key nutritional components
These bars are not just about taste; they also deliver some surprising nutrients:
- Fiber: With pumpkin as a base, each bar provides a decent fiber boost, promoting digestive health.
- Vitamins A and C: Pumpkin is rich in antioxidants, beneficial for your immune system.
- Healthy fats: The nuts and coconut used contribute healthy fats, aiding in satiety and heart health.
These bars can certainly fit into a balanced diet—check out the nutritional guidance from sources like the USDA Nutrition Database for more insights on how to incorporate them into your daily routine. Enjoy your Pumpkin Magic Bars Recipe and treat yourself to something healthy and delicious!
FAQ about Pumpkin Magic Bars
If you’re diving into the delicious world of pumpkin magic bars with our Pumpkin Magic Bars Recipe, you might have a few questions bubbling up. Let’s make sure you’re all set to create these delightful treats!
Can I use fresh pumpkin instead of canned?
Absolutely! Using fresh pumpkin can elevate the flavor of your bars. Just remember, fresh pumpkin has a higher water content than canned pumpkin, so be sure to roast and puree it properly to achieve the right consistency. Aim for about 2 cups of roasted, mashed pumpkin to substitute for a typical 15 oz can. You can find helpful tips on cooking fresh pumpkin on websites like Epicurious.
How do I store leftover Pumpkin Magic Bars?
Storing your leftover pumpkin magic bars is a breeze! Allow them to cool completely, then cut them into squares. Place them in an airtight container with parchment paper between layers to prevent sticking. They can be stored at room temperature for up to 3 days, or in the fridge for about a week. If you want them to last longer, consider freezing—more on that below!
Can I freeze Pumpkin Magic Bars for later?
Definitely! Freezing your pumpkin magic bars is a great way to save some for later. Simply wrap each square tightly in plastic wrap, then place them in a freezer-safe container or a resealable bag. They can last up to 3 months in the freezer. When you’re ready to enjoy them, just thaw them at room temperature or pop them in the microwave for a few seconds.
By preparing ahead, you can always have a batch of these delicious treats on hand for those unexpected guests or a cozy night in!
For more recipe tips, check out Martha Stewart’s guide on baking storage methods. Enjoy your baking adventure!
Conclusion on Pumpkin Magic Bars
Recap of the magic behind these bars
In this Pumpkin Magic Bars Recipe, we’ve explored the irresistible combination of rich pumpkin flavors, creamy layers, and a graham cracker crust that truly makes these bars magical. Each bite offers a perfect harmony of sweetness and a hint of spice, making them an instant favorite for gatherings or cozy nights in. The beauty of these bars is not just in their taste but also in their simplicity—perfect for both novice bakers and seasoned pros.
Invitation to share your pumpkin creations
Now that you’ve whipped up your own batch, we’d love to hear from you! Share your pumpkin magic bars creations with us on social media. What unique twists did you add? Your feedback and innovative ideas can inspire others in our baking community. For more pumpkin recipes, check out this handy fall recipe guide that showcases diverse ways to enjoy pumpkin all season long. Happy baking!
PrintPumpkin Magic Bars Recipe: Indulgent Treat for Fall Baking Fun
This Pumpkin Magic Bars Recipe is the perfect indulgent treat for your fall baking sessions. Enjoy a delightful blend of pumpkin and spices that will surely satisfy your sweet cravings.
- Prep Time: 15 minutes
- Cook Time: 30 minutes
- Total Time: 45 minutes
- Yield: 24 bars 1x
- Category: Dessert
- Method: Baking
- Cuisine: American
- Diet: Vegetarian
Ingredients
- 1 cup graham cracker crumbs
- 1/2 cup unsalted butter, melted
- 1 cup pumpkin puree
- 1 cup sweetened condensed milk
- 1 teaspoon vanilla extract
- 1 teaspoon pumpkin spice
- 1/2 teaspoon salt
- 1 cup chocolate chips
Instructions
- Preheat the oven to 350°F (175°C).
- In a bowl, combine graham cracker crumbs and melted butter. Press the mixture into a greased baking dish.
- In another bowl, mix pumpkin puree, sweetened condensed milk, vanilla extract, pumpkin spice, and salt until smooth.
- Pour the pumpkin mixture over the crust and spread evenly.
- Sprinkle chocolate chips on top.
- Bake for 25-30 minutes or until set. Let cool before cutting into bars.
Notes
- These bars are perfect for sharing with friends and family during fall gatherings.
- For added flavor, consider using nutmeg or cinnamon in combination with pumpkin spice.
Nutrition
- Serving Size: 1 bar
- Calories: 150
- Sugar: 15g
- Sodium: 75mg
- Fat: 7g
- Saturated Fat: 4g
- Unsaturated Fat: 2g
- Trans Fat: 0g
- Carbohydrates: 21g
- Fiber: 1g
- Protein: 2g
- Cholesterol: 20mg
Keywords: Pumpkin, Magic Bars, Dessert, Fall Baking