Outline for Pumpkin Scones
When the leaves begin to change and there’s a crispness in the air, many of us find ourselves gravitating toward the scents and flavors of fall. There’s something particularly comforting about indulging in homemade pumpkin scones, isn’t there? Whether you’re planning a cozy brunch with friends or just want to enjoy a personal treat with your morning coffee, this recipe is a fantastic way to celebrate the season. In this comprehensive guide, we’ll walk through everything you need to know about making delectable pumpkin scones—from the ingredients to baking tips and everything in between.
Ingredients You’ll Need for Pumpkin Scones
Understanding the right ingredients is crucial when creating any recipe, especially for pumpkin scones. Here’s a simple list to get you started:
- All-purpose flour: Essential for structure.
- Baking powder: To help your scones rise perfectly.
- Sugar: For sweetness.
- Salt: To balance flavors.
- Ground cinnamon, nutmeg, and ginger: These spices fuel that warm, fall flavor.
- Pumpkin puree: The star of the show! Look for 100% pure pumpkin (not pumpkin pie filling).
- Turkey bacon or chicken ham: Adds a savory component; chop it into small pieces.
- Heavy cream or milk: To add moisture and richness.
- Egg: Helps bind everything together.
Gathering your ingredients is the first step toward a fabulous homemade treat, so take your time picking out the best quality items you can find. Consider visiting local farmer’s markets for fresh pumpkin puree or spices!
Making Pumpkin Scones: Step-by-Step Instructions
Now, let’s dive into the actual process of making the perfect pumpkin scones. Here, you’ll find detailed yet easy-to-follow steps that will guide you each step of the way.
-
Preheat the Oven
Start by preheating your oven to 400°F (200°C). Preheating ensures that your scones will cook evenly and rise beautifully. -
Measuring Your Ingredients
Use a kitchen scale or measuring cups to accurately measure out your dry ingredients. Accurate measurement is key in baking, and a slight imbalance can affect your final product. -
Mixing the Dry Ingredients
In a large mixing bowl, whisk together the flour, baking powder, sugar, salt, and spices. This not only combines the dry ingredients but also aerates them, helping your scones to rise. -
Incorporating the Pumpkin Puree and Turkey Bacon
Create a well in the center of your dry mixture and add the pumpkin puree, chopped turkey bacon or chicken ham, egg, and heavy cream or milk. Gently mix until just combined—be careful not to overmix it as this can lead to tough scones. -
Shaping the Scones
Turn the dough out onto a floured surface. Pat it gently into a circle about 1-inch thick, then cut it into wedges. Alternatively, you can use a biscuit cutter to create round scones. -
Baking
Place your scones on a baking sheet lined with parchment paper. Brush the tops with a little heavy cream or milk for that lovely golden finish. Bake for about 15-20 minutes, or until they’re nicely risen and golden brown. -
Cooling and Enjoying
Allow your scones to cool slightly on the baking sheet before transferring them to a wire rack. Serve them warm with butter or your favorite jam!
Expert Tips for Fluffy Pumpkin Scones
- Cold Ingredients Matter: Just like when making biscuits, having cold butter (or in this case, cream) is essential for flaky scones.
- Don’t Overmix: Overmixing will give you dense scones. Mix just until combined for a light and airy texture.
- Seasonal Spices: Feel free to experiment with spices! For example, adding a pinch of allspice or cardamom can give your scones a unique twist.
- Storage: If you have leftovers (which is rare!), store them in an airtight container at room temperature for a day or two.
Pairing Your Pumpkin Scones
What’s better than enjoying fresh pumpkin scones on their own? Here are a few pairing ideas that can elevate your scone experience:
- Spiced Coffee or Latte: A warm spiced drink complements the flavors in the scones beautifully.
- Tea: A classic English breakfast tea or chai would enhance both the pumpkin and spice flavors.
- Homemade Spreads: Think apple butter, honey, or a cream cheese frosting for that sweet touch.
Frequently Asked Questions About Pumpkin Scones
You might be wondering if you can make any substitutions or how to troubleshoot common issues. Here are some answers to frequently asked questions:
-
Can I use fresh pumpkin?
Yes, you can use fresh pumpkin, just make sure to roast and pure it before adding it to your mix. -
Is it possible to make pumpkin scones gluten-free?
Absolutely! Substitute all-purpose flour with a gluten-free blend, ensuring it has xantham gum, or use almond flour for a different texture. -
Can I freeze pumpkin scones?
Yes, they freeze well! Just place them in an airtight container, layering parchment paper between them, and they’ll be good for up to three months.
The Joy of Making Pumpkin Scones
There’s something undeniably rewarding about creating your baked goods from scratch. Every step, from gathering ingredients to that first warm bite, becomes a cherished experience. When was the last time you made something so heartwarming? Sharing your freshly baked pumpkin scones with family or friends creates the perfect moment to laugh, reminisce, and enjoy a treat gone right.
For more inspiration, you might want to check out resources like King Arthur Baking Company for baking tips or to explore more about the versatility of pumpkin in various recipes.
In conclusion, whether it’s your first time or you’re a seasoned pro in the kitchen, these pumpkin scones are a delightful way to share the love of fall with everyone you know. Happy baking!
Introduction to Pumpkin Scones
Why Pumpkin Scones Are the Perfect Fall Treat
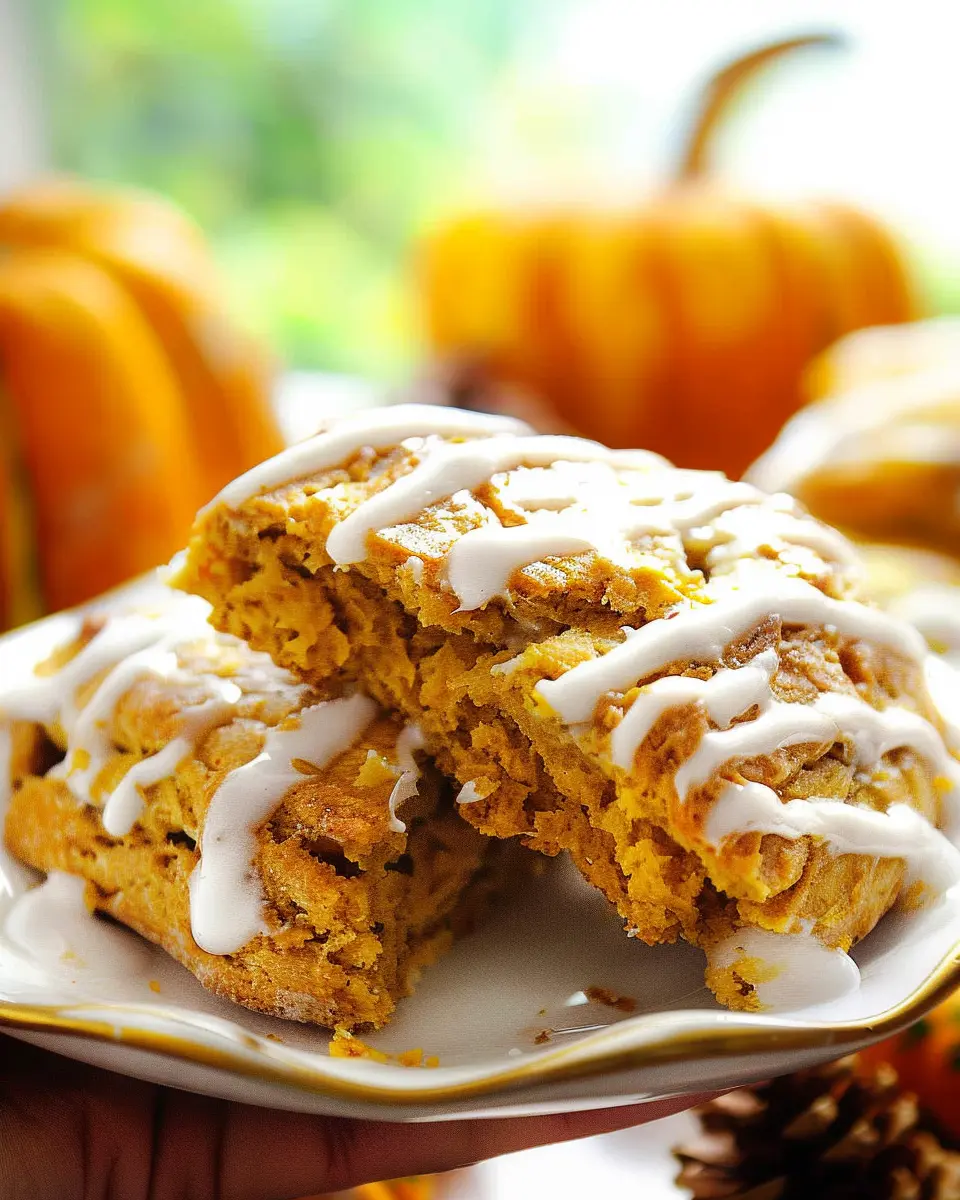
As the leaves turn golden and the air gets crisp, nothing beckons the fall season quite like the scent of freshly baked pumpkin scones. These delightful pastries combine the warm spices of cinnamon and nutmeg with the rich, comforting flavor of pumpkin, creating a perfect treat to enjoy during those chilly mornings or cozy afternoons. Their buttery texture paired with a subtle sweetness is guaranteed to warm you from the inside out, making them a top choice for brunches or for indulging while curled up with a good book.
Did you know that pumpkin is not only delicious but also packed with nutrients? It’s low in calories and high in fiber, making it a guilt-free indulgence. According to the American Institute for Cancer Research, pumpkin is loaded with antioxidants, which can help support overall health. So, you can enjoy your pumpkin scones not just for their exquisite flavor, but for the health benefits they bring as well!
My Personal Connection to Homemade Baking
Baking has always been a cherished part of my life, especially when it comes to seasonal delights like pumpkin scones. Growing up, the kitchen was the heart of our home where my family would gather, especially during fall. I remember the first time I attempted to whip up a batch of pumpkin scones. The flour flew everywhere, and let’s just say, my hands looked more like a baker’s play-dough project than a culinary masterpiece.
But as I got more comfortable with the process, I found joy not just in the end product but in creating something with my own hands. Each batch became a special occasion, shared with friends and family over steaming cups of spiced tea or coffee. There’s something comforting about enjoying a warm scone, perhaps topped with a little cream cheese frosting or drizzled with maple glaze.
In a world that often feels rushed, taking the time to bake pumpkin scones fosters a sense of mindfulness and connection. If you’re looking for a comforting way to welcome fall into your home, I can’t recommend these scones enough. They’re not just food; they’re a celebration of the season and a testament to the joy of homemade baking.
So, grab those pumpkins and let’s get started on creating a fall tradition that everyone will love! Check out my full pumpkin scones recipe below for the step-by-step guide.
Ingredients for Pumpkin Scones
Key ingredients you’ll need
Creating those delightful pumpkin scones starts with a handful of essential ingredients. Here’s what you’ll want to gather:
- All-purpose flour: This forms the base of your scones and gives them that perfect texture.
- Pumpkin puree: Opt for canned or homemade; either will impart that delicious autumn flavor.
- Baking powder and baking soda: These are critical for helping your scones rise beautifully.
- Butter: Cold, unsalted butter works best for flaky scones.
- Sugar: A little sweetness goes a long way; brown sugar adds a depth of flavor.
- Spices: Ground cinnamon, nutmeg, and ginger are all excellent choices to elevate that pumpkin essence.
- Milk: This helps to bind your ingredients while keeping the mixture moist.
Substitutions and alternatives
Life happens, and sometimes you need alternatives! Here are a few easy swaps for your pumpkin scones ingredients:
- Flour: For a gluten-free option, almond or coconut flour can work, but adjustments will be needed.
- Pumpkin puree: If you’re in a pinch, butternut squash puree is a great substitute.
- Butter: Coconut oil or a vegan butter alternative can maintain the scone’s flakiness.
- Sugar: Consider using maple syrup or honey if you’re looking for a natural sweetener.
- Milk: Dairy-free milk, like almond or oat milk, can easily replace regular milk without compromising flavor.
Experimenting with these ingredients can make your baking experience even more enjoyable. For additional tips, check out this fantastic resource on baking basics that dives deeper into ingredient roles!
Preparing Pumpkin Scones
The crisp air and colorful leaves signal that it’s time to indulge in the seasonal delight of pumpkin scones. With flavors of warm spices and the comforting essence of pumpkin, this delightful treat is sure to please. Follow these steps to create pumpkin scones that are perfectly fluffy and delicious.
Gather your ingredients
Before diving into the baking process, ensure you have all the necessary ingredients ready and waiting. Here’s what you’ll need:
- 2 cups all-purpose flour
- 1/3 cup granulated sugar
- 1 tablespoon baking powder
- 1 teaspoon ground cinnamon
- 1/2 teaspoon ground nutmeg
- 1/4 teaspoon ground ginger
- 1/2 teaspoon salt
- 1/2 cup cold unsalted butter, cut into cubes
- 1/2 cup canned pure pumpkin (not pumpkin pie filling)
- 1/4 cup heavy cream
- 1 large egg
- 1 teaspoon vanilla extract
Having everything assembled will streamline the process and make your time in the kitchen enjoyable.
Mix the dry ingredients
Start by sifting together the dry ingredients in a large bowl. Combine the flour, sugar, baking powder, cinnamon, nutmeg, ginger, and salt. Sifting adds air to the flour, which helps create lighter pumpkin scones. Mix them thoroughly, ensuring even distribution of the spices for a delightful flavor in every bite.
Cut in the cold butter
Next, it’s time to work in the butter! Add the cold, cubed butter to your dry ingredients. You can use a pastry cutter, two forks, or even your fingertips to combine the butter until it resembles coarse crumbs. This step is crucial for that tender texture we all seek in baked goods. Remember, the key is to handle the butter as little as possible to avoid melting it.
Incorporate the wet ingredients
In a separate bowl, whisk together the pumpkin puree, heavy cream, egg, and vanilla extract until combined. This flavorful mixture packs a warm, cozy punch that complements the scones beautifully. Gradually pour the wet mixture into the dry ingredients, stirring gently until just combined. Be careful not to overmix—it’s okay if there are a few lumps.
Shape and cut the scones
Once your dough comes together, transfer it onto a floured surface. Pat it into a circle about 1 inch thick. Using a sharp knife or a pastry cutter, slice the dough into triangles or wedges. You can also use a round cutter for classic biscuit shapes. Remember to keep the shapes uniform for even baking.
Chill the scones
Before baking, pop your pumpkin scones into the fridge for about 30 minutes. This chilling process not only helps them maintain their shape while baking but also develops the flavors further. While waiting, you can prepare your baking sheet, lining it with parchment paper for easy cleanup.
Bake the scones to perfection
Preheat your oven to 400°F (200°C) while the scones are chilling. Once ready, place the scones on the prepared baking sheet, making sure to leave a bit of space between each piece. Bake for 15-20 minutes or until they are golden brown on top. The aroma wafting through your home will be absolutely irresistible!
Prepare the vanilla glaze
While your scones are baking, prepare a simple vanilla glaze to elevate their flavor. Mix together 1 cup of powdered sugar, 2 tablespoons of heavy cream, and 1/2 teaspoon of vanilla extract in a small bowl. Adjust the consistency by adding more cream or sugar until it’s just right for drizzling.
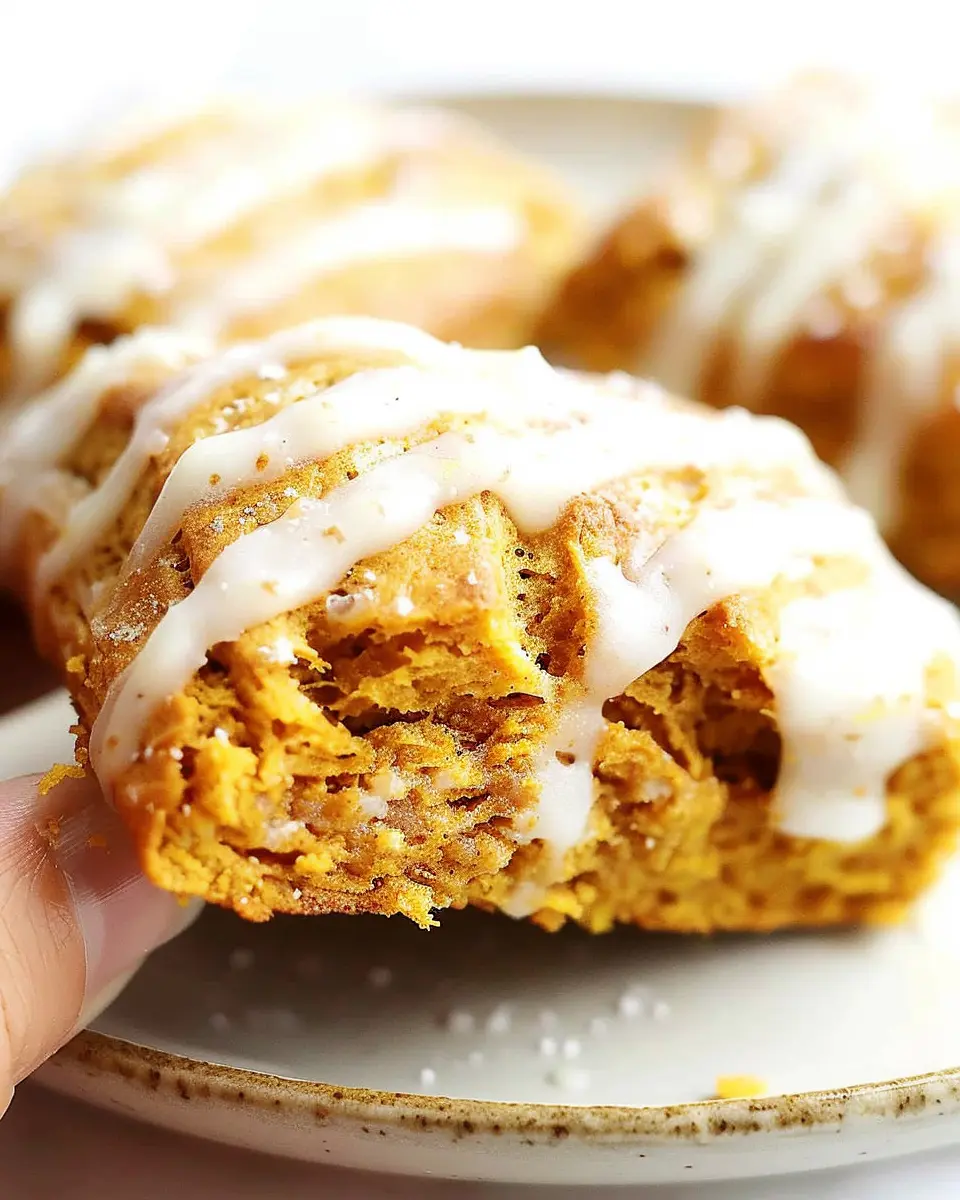
Drizzle and serve
Once the scones have cooled for about 10 minutes, get ready to drizzle! Use a spoon or a piping bag to apply the glaze over your freshly baked pumpkin scones. Serve them warm with a cup of coffee or tea and enjoy the delightful fall flavors.
These pumpkin scones are not just tasty; they also create a warm atmosphere, perfect for sharing with friends or indulging in a cozy self-care moment. Happy baking!
Variations on Pumpkin Scones
When it comes to pumpkin scones, there are endless possibilities for customization. Here are some fun variations that can elevate your baking game.
Adding Chocolate Chips for Extra Sweetness
One of the simplest ways to enhance your pumpkin scones is by incorporating chocolate chips. Imagine biting into a warm scone, only to discover pockets of melted chocolate! For a twist, try milk chocolate for classic sweetness or dark chocolate for a rich contrast. This adds an indulgent touch, perfect for those cozy weekend mornings or unexpected guests. If you’re feeling adventurous, mix in some white chocolate chips and chopped pecans for a delightful flavor explosion.
Experimenting with Different Spices
While traditional pumpkin scones often feature cinnamon and nutmeg, don’t hesitate to mix things up! Consider adding ginger, cardamom, or even a hint of allspice to your batter. These spices not only enhance the flavor but can also deliver added health benefits—ginger is great for digestion, and cardamom can boost your mood. Curious about spice combinations? Check out sources like the Herbs and Spices Association for inspiration.
Gluten-Free Pumpkin Scones
Eating gluten-free doesn’t mean sacrificing delicious baked goods. For gluten-free pumpkin scones, substitute regular flour with a gluten-free blend or almond flour. You might need to adjust the liquid content slightly, so keep an eye on the dough’s consistency. Many find that adding a bit of baking soda gives these scones a delightful rise, making them just as fluffy as traditional ones. For more tips on gluten-free baking, visit Gluten-Free Living.
Experimenting with these variations can make each batch of pumpkin scones feel like a new adventure. Happy baking!
Cooking Tips and Notes for Pumpkin Scones
Importance of Chilled Ingredients
When making pumpkin scones, using chilled ingredients is non-negotiable! Cold butter and cream help create that delightful flaky texture we all love. When butter is cold, it doesn’t fully blend into the flour, allowing tiny pockets of fat that steam during baking, creating those lovely layers. For best results, toss your butter in the freezer for about 15 minutes before starting, and make sure your cream is straight from the fridge.
How to Achieve the Perfect Texture
To nail that perfect texture, remember two key rules: don’t overmix and embrace the rustic look! Gently mix your dough until just combined—lumps are okay. The goal is to avoid activating the gluten too much, which can lead to tough scones. A light touch is your best friend here. Also, consider adding pumpkin spice for extra flavor, and feel free to experiment with mix-ins like chocolate chips or nuts for a fun twist!
For more expert baking tips, check out this helpful guide on scone-making to take your skills to the next level.
Serving Suggestions for Pumpkin Scones
Pairing with coffee or tea
Imagine starting your morning with a warm pumpkin scone alongside a steaming cup of coffee or your favorite tea. The spices in the scone beautifully complement rich coffee, while herbal teas bring out the scone’s subtle sweetness. For a special touch, try a cinnamon-spiced latte or a chai tea—both harmonize perfectly with the fall flavors of your scone. If you’re a fan of cold brews, consider adding a splash of pumpkin spice syrup to elevate your drink.
Serving at brunch or fall gatherings
Pumpkin scones are a delightful addition to any brunch or autumn gathering. Whether you’re hosting friends or enjoying a cozy family get-together, these scones offer a fantastic finger food option. Serve them with a variety of spreads like cream cheese or even apple butter for an unexpected twist. Your guests will love having something beyond the usual, and they look beautiful arranged on a platter. Just imagine the conversations flowing over these delicious treats! For more ideas on incorporating seasonal favorites into your gatherings, check out our guide to hosting a fall brunch.
Time Breakdown for Pumpkin Scones
When you’re ready to make pumpkin scones, knowing how much time it takes can help you plan your baking adventure effectively. Here’s a quick breakdown:
Preparation Time
You’ll need about 20 minutes to prep your ingredients and mix everything together. This includes measuring out flour, sugar, and those delightful pumpkin spices. Having everything organized makes the process smoother, so consider laying out your tools beforehand!
Baking Time
The actual baking of your pumpkin scones will take around 15-18 minutes. You’ll know they’re done when they’re golden brown and your kitchen smells heavenly. Trust me; it’s hard to resist that aroma!
Total Time
In total, you’re looking at approximately 35-38 minutes from start to finish. This makes it a fantastic option for a cozy weekend brunch or a quick weekday treat. Who wouldn’t love freshly baked pumpkin scones in under an hour? If you’re curious about variations or serving suggestions, check out this resource for some fun ideas!
Nutritional Facts for Pumpkin Scones
Calories per serving
Enjoying a delightful pumpkin scone means keeping nutrition in mind. Each scone typically contains around 180-200 calories depending on the ingredients used. If you opt for healthier substitutions like almond milk or less sugar, you can lower this number while still savoring the flavors.
Breakdown of key nutrients
These delightful treats provide a good mix of essential nutrients:
- Carbohydrates: Approximately 30-35 grams for energy.
- Protein: About 2-4 grams, helping you feel full.
- Fats: Typically 6-10 grams, with heart-healthy options like coconut oil.
- Fiber: Pumpkin contributes about 1-2 grams of dietary fiber, supporting digestive health.
Adding ingredients like nuts or seeds can further enhance the nutritional profile of your scones. Check out this nutritional guide for more insights on pumpkin’s benefits!
FAQs about Pumpkin Scones
Can I make these scones ahead of time?
Absolutely! One of the great things about pumpkin scones is that they are perfect for meal prep. You can whip up the dough and shape it into a round, then wrap it tightly in plastic wrap and refrigerate for up to 24 hours before baking. Alternatively, once baked, these scones can be made a day or two in advance. Just let them cool completely before storing them. For an easy breakfast option, consider making a batch over the weekend to enjoy all week.
How should I store leftover scones?
To keep your leftover pumpkin scones fresh, store them in an airtight container at room temperature for up to two days. If you want them to last longer, consider freezing them. Just wrap each scone tightly in plastic wrap and place them in a freezer-safe bag. When you’re ready to enjoy one, simply thaw it at room temperature or warm it in the oven for a few minutes.
What can I use instead of pumpkin purée?
If you find yourself in a pinch without pumpkin purée, consider using other options like butternut squash purée or sweet potato purée. Both alternatives provide a similar texture and flavor profile. You could also make a custom blend using roasted carrots and spices if you’re feeling adventurous! Just keep in mind that different purées may slightly alter the final flavor.
For more tips on scone-making, check out King Arthur Baking and discover a wealth of baking wisdom you can incorporate into your culinary adventures. Happy baking!
Conclusion on Pumpkin Scones
The joy of baking at home
Baking pumpkin scones at home is a delightful experience that brings warmth and comfort to your kitchen. The simple act of combining ingredients, the enticing aroma filling the air, and the satisfaction of enjoying your creation is truly special. Plus, sharing them with friends and family can turn an ordinary day into a cherished memory. Whether you’re a novice baker or a seasoned pro, there’s always joy to be found in creating something delicious from scratch.
Final thoughts on enjoying pumpkin scones this season
As the leaves change and the chill in the air sets in, pumpkin scones are perfect for cozy autumn mornings. Enjoy them with a cup of coffee or herbal tea, or even pair with a hearty breakfast of turkey bacon or chicken ham to round out your meal. Whatever your preference, embrace the flavors of the season and treat yourself to a delightful baked good. For more festive ideas, consider exploring recipes at BBC Good Food. So go ahead, gather your ingredients, and let the baking begin!
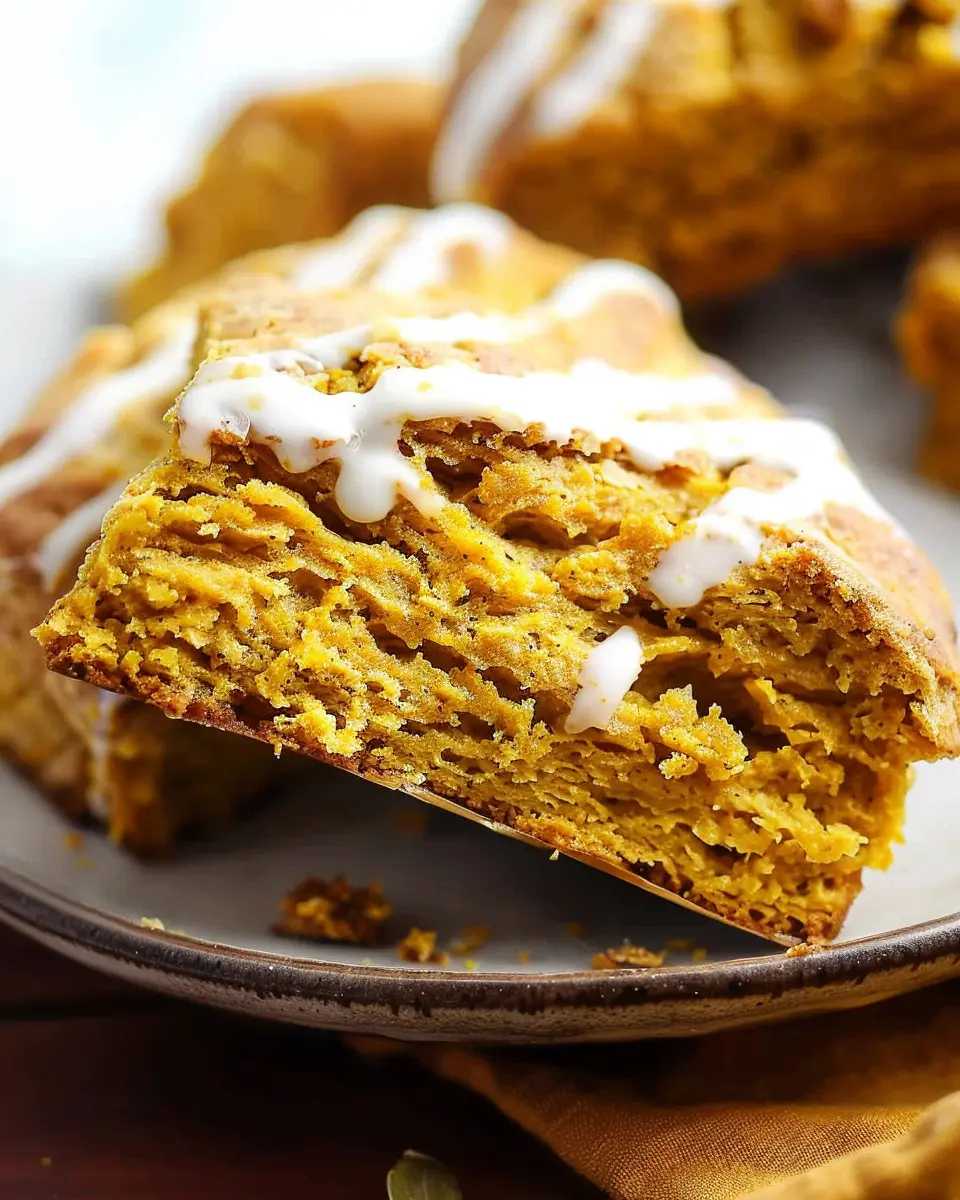
PrintPumpkin Scones: Easy, Delicious Treats for Every Fall Gathering

Delight your guests this fall with these easy and delicious pumpkin scones, perfect for any gathering.
- Prep Time: 15 minutes
- Cook Time: 20 minutes
- Total Time: 35 minutes
- Yield: 12 scones 1x
- Category: Desserts
- Method: Baking
- Cuisine: American
- Diet: Vegetarian
Ingredients
- 2 cups all-purpose flour
- 1 cup canned pumpkin puree
- 1/2 cup brown sugar
- 1/4 cup granulated sugar
- 1/2 cup cold butter, diced
- 1 tablespoon baking powder
- 1 teaspoon ground cinnamon
- 1/2 teaspoon ground nutmeg
- 1/4 teaspoon salt
- 1/2 cup heavy cream
- 1 egg
Instructions
- Preheat the oven to 400°F (200°C).
- In a large bowl, mix flour, brown sugar, granulated sugar, baking powder, spices, and salt.
- Add the cold butter and mix until crumbly.
- Stir in pumpkin puree, cream, and egg until just combined.
- Turn dough onto a floured surface, roll it out into a circle, and cut into wedges.
- Place on a baking sheet and bake for 15-20 minutes until golden.
- Allow to cool before serving.
Notes
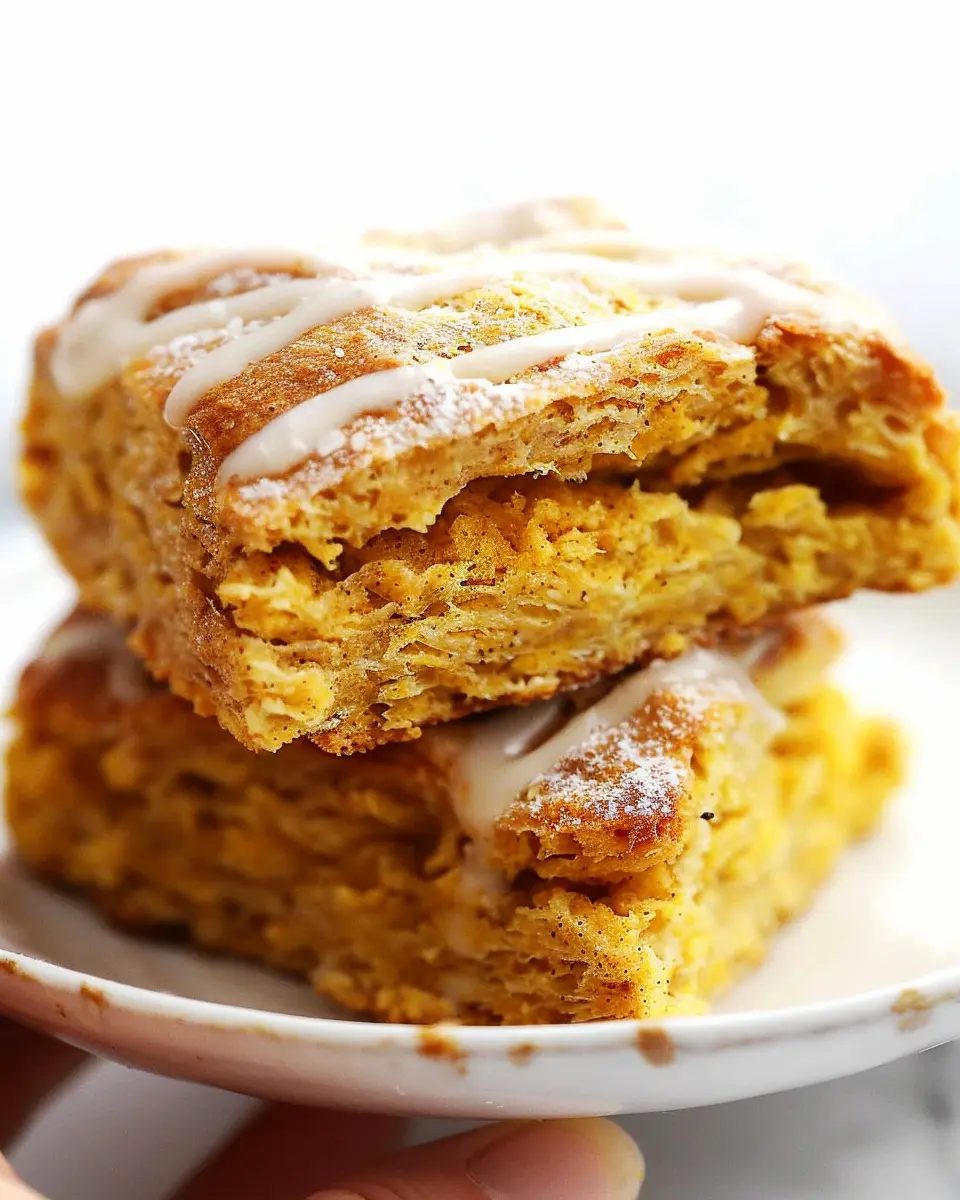
- Serve warm with a drizzle of icing for added sweetness.
- These scones can be made ahead and stored for later enjoyment.
Nutrition
- Serving Size: 1 scone
- Calories: 200
- Sugar: 10g
- Sodium: 150mg
- Fat: 8g
- Saturated Fat: 5g
- Unsaturated Fat: 2g
- Trans Fat: 0g
- Carbohydrates: 28g
- Fiber: 2g
- Protein: 3g
- Cholesterol: 30mg
Keywords: Pumpkin Scones, Fall Treats, Easy Recipes