
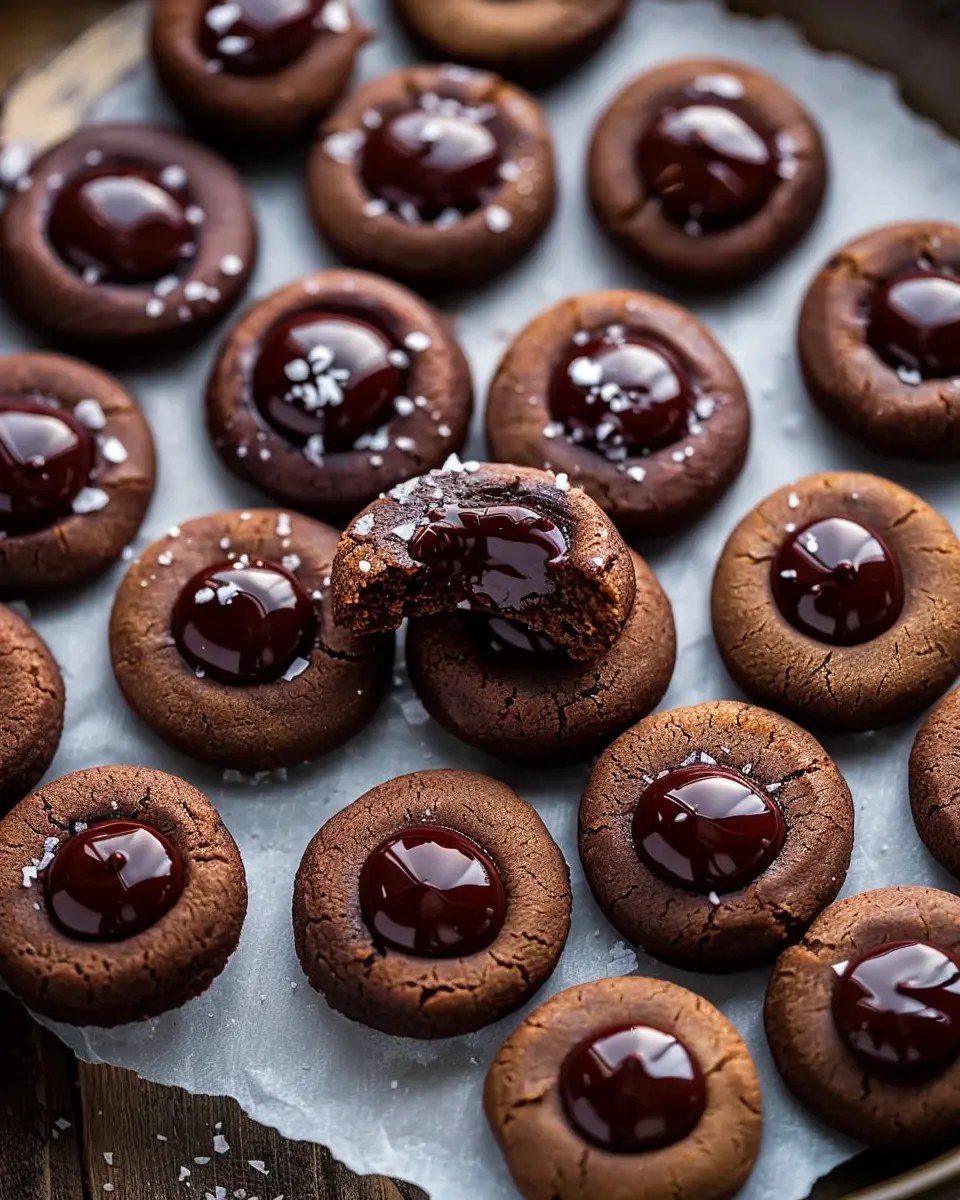
Introduction to Chocolate Thumbprint Cookies
If you’re a young professional juggling a career and a busy social life, you know the importance of having simple yet delightful treats on hand. Enter Chocolate Thumbprint Cookies, the perfect solution for both sweet cravings and impressing your friends. These scrumptious cookies are not only easy to make, they’re also an excellent addition to your culinary repertoire, especially if you need a last-minute indulgence for a gathering or cozy night in.
Why Chocolate Thumbprint Cookies are a Must-Try for Young Professionals
What’s so special about these cookies? To start, their unique thumbprint design—they allow you to fill each cookie with a rich chocolate ganache, jam, or even your favorite nut butter. It’s a fun, hands-on baking experience that can help relieve stress after a long day. Imagine coming home, rolling up your sleeves, and creating these delightful treats with ease.
These cookies strike the right balance between indulgence and practicality. According to recent baking trends, easy-to-make recipes are leading the way, allowing busy professionals to whip up something delicious without spending hours in the kitchen. Plus, when you take that first bite, the burst of rich chocolate paired with the buttery cookie will certainly make you feel like you’ve just treated yourself to something special.
Not to mention the versatility: Chocolate Thumbprint Cookies can be customized to suit any palate. Prefer a fruity twist? Try adding raspberry or apricot jam in the center. Want a nutty flavor? Substitute chocolate for your go-to nut butter. The possibilities are endless!
When it comes to gatherings, these cookies are a hit. They promote conversation, entice everyone with their beautiful appearance, and invite curiosity about what’s inside. Just a quick tip: think about pairing them with a warm cup of herbal tea or some fresh milk for a cozy vibe.
So why wait? Chocolate Thumbprint Cookies not only satisfy your sweet cravings, but they also provide a chance for creativity and connection with those you care about. If you want to dive deeper into the world of baking, you can find inspiration from seasoned bakers and recipe hubs online, offering a variety of delicious ideas to keep your cooking journey exciting. Now, let’s get baking!
Ingredients for Chocolate Thumbprint Cookies
Essential Ingredients for Rich and Chewy Cookies
When it comes to baking delicious Chocolate Thumbprint Cookies, the quality of your ingredients makes all the difference. Here’s a smart and straightforward list of what you’ll need to whip up a batch of these delightful treats:
- All-Purpose Flour: The backbone of your cookies. A good flour will create that perfect chewy texture.
- Cocoa Powder: Choose unsweetened cocoa for rich chocolate flavor—this is what transforms them into chocolatey heaven!
- Granulated Sugar: Sweetness that balances the bitterness of cocoa; don’t skimp here!
- Butter: Opt for unsalted butter to control the salt level in your cookies. It adds a luscious richness that’s hard to beat.
- Eggs: They bind your ingredients together and provide moisture for that perfect chewiness.
- Vanilla Extract: A splash of this magic ingredient elevates the flavors and adds warmth.
- Chocolate Chips or Chunks: For the thumbprint filling, you’ll want something decadent—dark chocolate works wonders!
Ready to embark on your cookie adventure? Consider exploring tips on how to choose quality cocoa powder here and elevate your baking game!
Preparing Chocolate Thumbprint Cookies
Making Chocolate Thumbprint Cookies is one of those delightful baking adventures that fills your kitchen with an irresistible aroma. These chewy, chocolatey treats are not just a feast for the palate but also a pleasure to the eyes when topped with a luscious chocolate ganache. Ready to get started? Let’s walk through the process step-by-step!
Gather and Measure Your Ingredients
First things first, you need to assemble your ingredients. Here’s what you’ll need to create these delicious cookies:
- 1 cup unsweetened cocoa powder
- 1 cup all-purpose flour
- 1/2 cup butter, softened
- 1 cup granulated sugar
- 1/4 cup brown sugar
- 2 large eggs
- 1 teaspoon vanilla extract
- 1/2 teaspoon baking powder
- A pinch of salt
- About 1 cup semi-sweet chocolate chips (for the ganache)
Before you dive in, it’s a good practice to measure everything accurately. This ensures consistency in baking and helps you avoid any last-minute surprises. Pro tip: using a kitchen scale can really streamline this step!
Make the Cookie Dough
Once your ingredients are ready, it’s time to whip up that cookie dough. Begin by creaming together your softened butter with both the granulated and brown sugars in a large mixing bowl until it’s light and fluffy. This usually takes about 2-3 minutes with an electric mixer on medium speed.
Next, add the eggs and the vanilla extract, mixing until everything is well incorporated. In a separate bowl, whisk together the cocoa powder, flour, baking powder, and salt. Gradually combine the dry ingredients with the wet mixture until a smooth cookie dough forms. It might seem a bit crumbly at first, but don’t worry—it will come together beautifully!
Shape the Cookies and Create Indents
Now comes the fun part—shaping your Chocolate Thumbprint Cookies! Preheat your oven to 350°F (175°C) while you scoop the dough using a tablespoon or cookie scoop. Roll each scoop into a ball and place it on a lined baking sheet.
Once all the dough is shaped into balls, use your thumb (or the back of a teaspoon if you prefer) to make a small indent in the center of each cookie. Be sure not to press too hard; you want room for that delicious ganache later.
Chill the Cookie Dough
Chilling your cookie dough is a crucial step that often gets overlooked. Placing it in the fridge for at least 30 minutes helps the cookies maintain their shape while baking. Plus, it lets the flavors meld together even better. Use this time to relax or clean up your baking area—it’s a win-win!
Bake to Perfection
After chilling, it’s time to pop your cookies into the oven. Bake them for about 10-12 minutes or until the edges are just set. The centers will look a bit soft, which is perfectly fine as they’ll continue to firm up while cooling. Allow them to cool on the baking sheet for about 5 minutes before transferring them to a wire rack to cool completely.
Prepare the Ganache
While those cookies are cooling, prepare your chocolate ganache. Simply heat the chocolate chips and a few tablespoons of heavy cream in a microwave-safe bowl in 30-second increments, stirring in between until smooth and glossy. If you’re a fan of more adventurous flavors, consider adding a splash of brewed coffee or espresso to elevate the chocolate flavor.
Assemble the Cookies
Once your cookies are cooled and the ganache is prepared, it’s time to finish your Chocolate Thumbprint Cookies. Spoon a small amount of the ganache into the indents of each cookie. Let the ganache set for a few minutes, and voilà! You have a batch of irresistible cookies that are just begging to be shared.
Baking these cookies can be a great way to unwind after a long week or impress your friends at a gathering. For more delicious cookie variations, consider checking out Cookies and Cups or other foodie sites for inspiration. Enjoy your baking adventure!
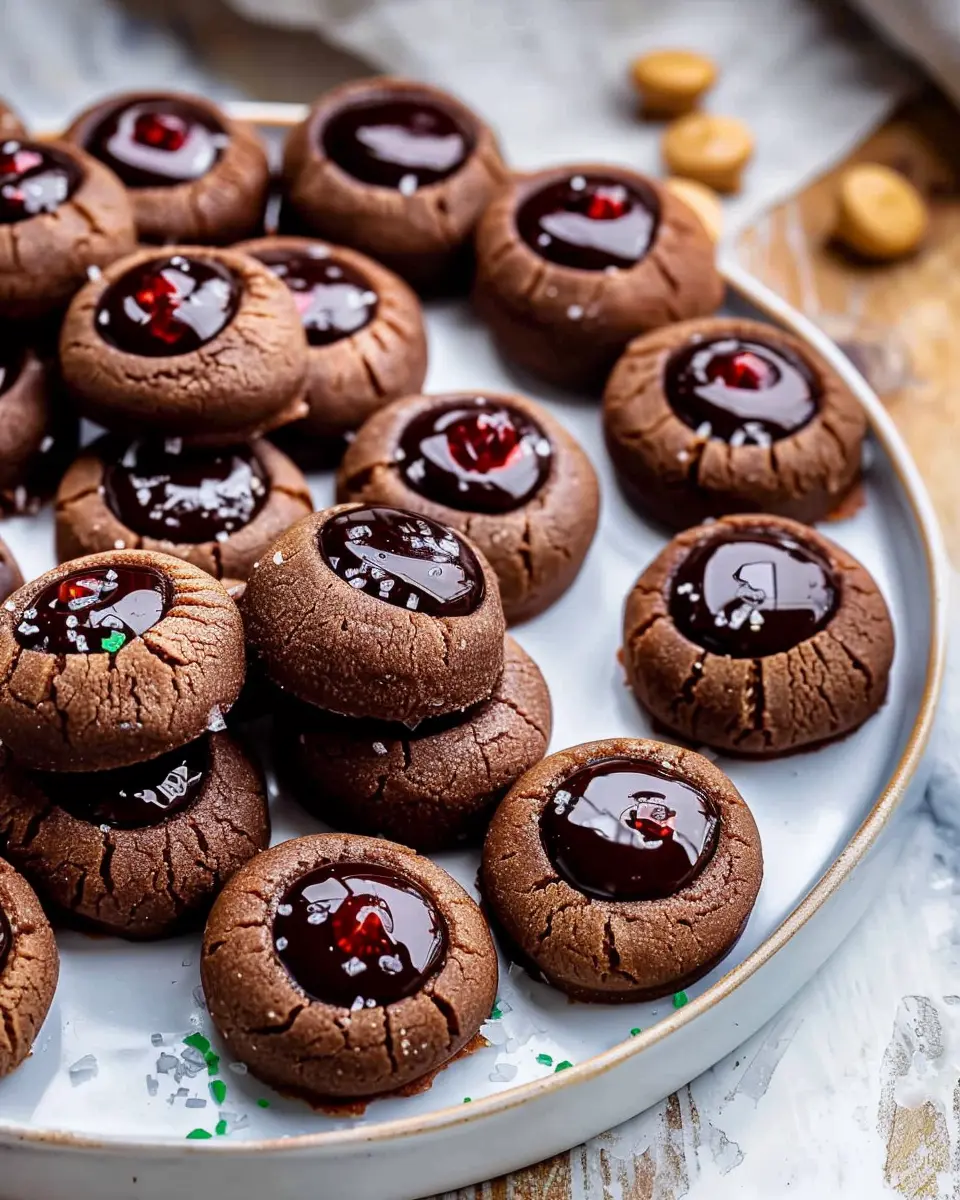
Variations on Chocolate Thumbprint Cookies
When it comes to Chocolate Thumbprint Cookies, the classic recipe is just the beginning. Let’s explore some delightful variations that can elevate your cookie game and impress your friends.
Nutty Chocolate Thumbprints
Add a satisfying crunch to your Chocolate Thumbprint Cookies by incorporating nuts. Simply mix in finely chopped walnuts or pecans into the dough. For a touch of gourmet, try topping each cookie with a dollop of chocolate ganache made with a hint of nut butter—think hazelnut spread or almond butter. This not only enhances texture but also brings a rich, nutty flavor that pairs beautifully with chocolate.
Fruity Chocolate Thumbprints with Jam
Craving something fruity? Fill the thumbprint of your Chocolate Thumbprint Cookies with your favorite jam or preserve. Raspberry, apricot, or even fig jam can lend a delightful sweetness that cuts through the rich chocolate. You could even experiment with homemade fruit spreads if you’re feeling adventurous—learn how to make your own fruit preserves for an added natural touch.
Spicy Chocolate Thumbprints with Chili
For those who love a bit of heat, consider integrating a hint of chili powder or cayenne pepper into your Chocolate Thumbprint Cookies. This unexpected twist creates a lively contrast of flavors that’s bound to be a conversation starter at your next gathering. Remember, just a pinch can go a long way!
Don’t hesitate to get creative! The possibilities are endless, and unique adaptations can make your baking experience even more enjoyable. With these variations, you’ll keep your friends guessing what delightful twist comes next. Each bite will remind you that baking should be fun and expressive!
Baking Notes for Chocolate Thumbprint Cookies
Tips for Perfecting the Dough
To create melt-in-your-mouth Chocolate Thumbprint Cookies, start with room-temperature butter and eggs for a smooth, creamy dough. Be careful not to overmix after adding the dry ingredients; this prevents tough cookies. Consider chilling the dough for 30 minutes to enhance flavor and improve texture. A dash of espresso powder can intensify the chocolate flavor—it’s a little secret you’ll love.
Common Mistakes to Avoid
One common pitfall is skipping the thumbprint step. Press down firmly but don’t go too deep; you want a nice well for the filling, not a crumbled cookie. Another mistake is not adjusting baking time based on your oven. Every oven is different—your cookies should be set but not hard.
Equipment Suggestions for Success
Invest in a sturdy baking sheet and parchment paper to encourage even baking. A small cookie scoop will help keep your Chocolate Thumbprint Cookies uniform in size. A silpat mat can also be a game changer for easy removal, making cleanup a breeze!
For more tips and baking resources, check out King Arthur Baking or The Kitchn. Happy baking!

Serving Suggestions for Chocolate Thumbprint Cookies
Creative Ways to Serve and Present
When it comes to Chocolate Thumbprint Cookies, presentation is half the fun. Stack your cookies on a beautiful cake stand for a classic look, or arrange them on a colorful plate to brighten up any gathering. For a playful touch, consider using small, clear cellophane bags tied with a ribbon, perfect for party favors. And if you’re feeling crafty, dip the bottoms in melted chocolate or drizzle them with white chocolate for an extra touch of elegance.
Pairing Options for a Sweet Delight
While Chocolate Thumbprint Cookies shine on their own, pairing them can elevate your dessert experience. Serve them alongside creamy vanilla bean ice cream for a delectable contrast. Alternatively, brew a rich cup of coffee or a light herbal tea to balance the sweetness. Fresh fruit, like strawberries or raspberries, can also provide a refreshing tang. For a fun twist, try pairing them with flavored sparkling water or a creamy milkshake.
For more serving ideas, check out Food52 for inspiration from chefs and home cooks alike. With endless pairing options, you can customize your dessert experience to suit any occasion!
Time Details for Chocolate Thumbprint Cookies
Preparation Time
Making Chocolate Thumbprint Cookies is a breeze! You’ll want to set aside about 20 minutes for preparation. This includes gathering your ingredients, mixing the dough, and shaping those delightful little thumbprint wells.
Baking Time
Once you’re ready to bake, these cookies need about 12-15 minutes in the oven. Keep an eye on them as they bake — the perfect cookie comes out slightly firm on the edges yet soft in the center.
Total Time
Adding it all up, you’re looking at around 35-40 minutes from start to finish. Perfect for an afternoon treat or a fun baking session with friends! Want to know more about the science behind baking? Check out The Kitchn for expert tips.
Nutritional Information for Chocolate Thumbprint Cookies
When you indulge in Chocolate Thumbprint Cookies, it’s always good to have a sense of what you’re enjoying. Here’s the breakdown:
Calories
Each delightful cookie packs around 150 calories, making it a sweet yet moderate treat. Perfect for sharing (or not)!
Sugar Content
These cookies have about 10 grams of sugar. While they satisfy that sweet tooth, be mindful of how many you indulge in!
Protein
With around 2 grams of protein per cookie, they won’t provide a hefty boost, but every little bit helps, especially when paired with a glass of milk.
For more insights into baking and nutrition, check out resources like Healthline or the USDA FoodData Central for detailed food profiles!
FAQs about Chocolate Thumbprint Cookies
How can I make my chocolate cookies softer?
To achieve soft and chewy Chocolate Thumbprint Cookies, it’s all about your ingredients and baking time. Try these tips:
- Butter Temperature: Make sure your unsalted butter is at room temperature. This helps create air pockets that lead to a softer texture.
- Don’t Overmix: When you combine the ingredients, mix just until the dry ingredients are incorporated to avoid tough cookies.
- Bake Time: Keep an eye on the cookies and pull them out when they are slightly underbaked. They will continue to set as they cool.
What can I use instead of chocolate ganache?
While chocolate ganache is a delightful topping for Chocolate Thumbprint Cookies, you have alternatives! Here are some ideas:
- Nut Butter: A simple almond or peanut butter drizzle adds a different flavor profile and creaminess.
- Cream Cheese Frosting: Whipped cream cheese can give a tangy twist to your cookies without overshadowing the chocolate.
- Store-Bought Chocolate Syrup: Quick and easy, chocolate syrup can be drizzled on top for a sweet touch.
How do I store leftovers?
If you’re lucky enough to have leftovers of your Chocolate Thumbprint Cookies, proper storage is key to keeping them fresh. Here’s how:
- Airtight Container: Store them in an airtight container at room temperature for up to a week.
- Freezing: For longer storage, freeze the cookies in a single layer on a baking sheet. Once frozen, transfer them to a freezer-safe bag for up to three months. Just let them thaw before enjoying!
When it comes to baking, the right techniques and storage can make a world of difference. Enjoy your baking journey, and make sure to share your creations with friends! If you’re curious about more cookie tips and tricks, check out resources like King Arthur Baking or The Spruce Eats.
Conclusion on Chocolate Thumbprint Cookies
Final Thoughts on Homemade Cookie Joy
There’s something truly special about creating Chocolate Thumbprint Cookies from scratch. The blend of rich chocolate with a delightful filling not only satisfies your sweet tooth but also evokes warm memories of baking in the kitchen. Homemade cookies can easily outperform store-bought varieties, providing a personal touch that simply can’t be matched.
Imagine sharing these treats with friends at a gathering, or indulging in one after a long workday. The joy of baking, combined with the delightful end result, makes the process rewarding. If you’re looking for a fun baking project, give this cookie recipe a try! You’ll discover that the simple act of baking can bring a little happiness into your day. For more tips on cookie baking and decorating, check out resources like King Arthur Baking for some great insights.
PrintChocolate Thumbprint Cookies: Indulgent Treats to Satisfy Cravings

These chocolate thumbprint cookies are the perfect delight for sweet cravings, offering a rich chocolate flavor with a gooey center.
- Prep Time: 15 minutes
- Cook Time: 12 minutes
- Total Time: 27 minutes
- Yield: 12 cookies 1x
- Category: Dessert
- Method: Baking
- Cuisine: American
- Diet: Vegetarian
Ingredients
- 1 cup all-purpose flour
- 1/2 cup unsweetened cocoa powder
- 1/2 cup unsalted butter, softened
- 1/2 cup granulated sugar
- 1/4 cup brown sugar
- 1 large egg
- 1 teaspoon vanilla extract
- 1/4 teaspoon salt
- 1/2 cup chocolate chips
Instructions
- Preheat your oven to 350°F (175°C).
- In a bowl, mix the flour, cocoa powder, and salt together.
- In another bowl, cream the butter, granulated sugar, and brown sugar until light and fluffy.
- Add the egg and vanilla extract to the butter mixture and mix well.
- Gradually add the dry ingredients to the wet ingredients, mixing until combined.
- Roll dough into 1-inch balls and place them on a baking sheet.
- Make a thumbprint in the center of each ball.
- Bake for 10-12 minutes until set.
- Remove from oven and fill each thumbprint with chocolate chips.
Notes
- For an extra touch, sprinkle sea salt on top before baking.
- These cookies can be made a day in advance and stored in an airtight container.
Nutrition
- Serving Size: 1 cookie
- Calories: 120
- Sugar: 10g
- Sodium: 50mg
- Fat: 7g
- Saturated Fat: 4g
- Unsaturated Fat: 2g
- Trans Fat: 0g
- Carbohydrates: 15g
- Fiber: 1g
- Protein: 2g
- Cholesterol: 20mg
Keywords: Chocolate Thumbprint Cookies, Cookies, Chocolate Treats